
Step-by-Step Guide to ATK’s Gluten-Free White Chocolate Cake Recipe
Table of Contents
Understanding the Recipe
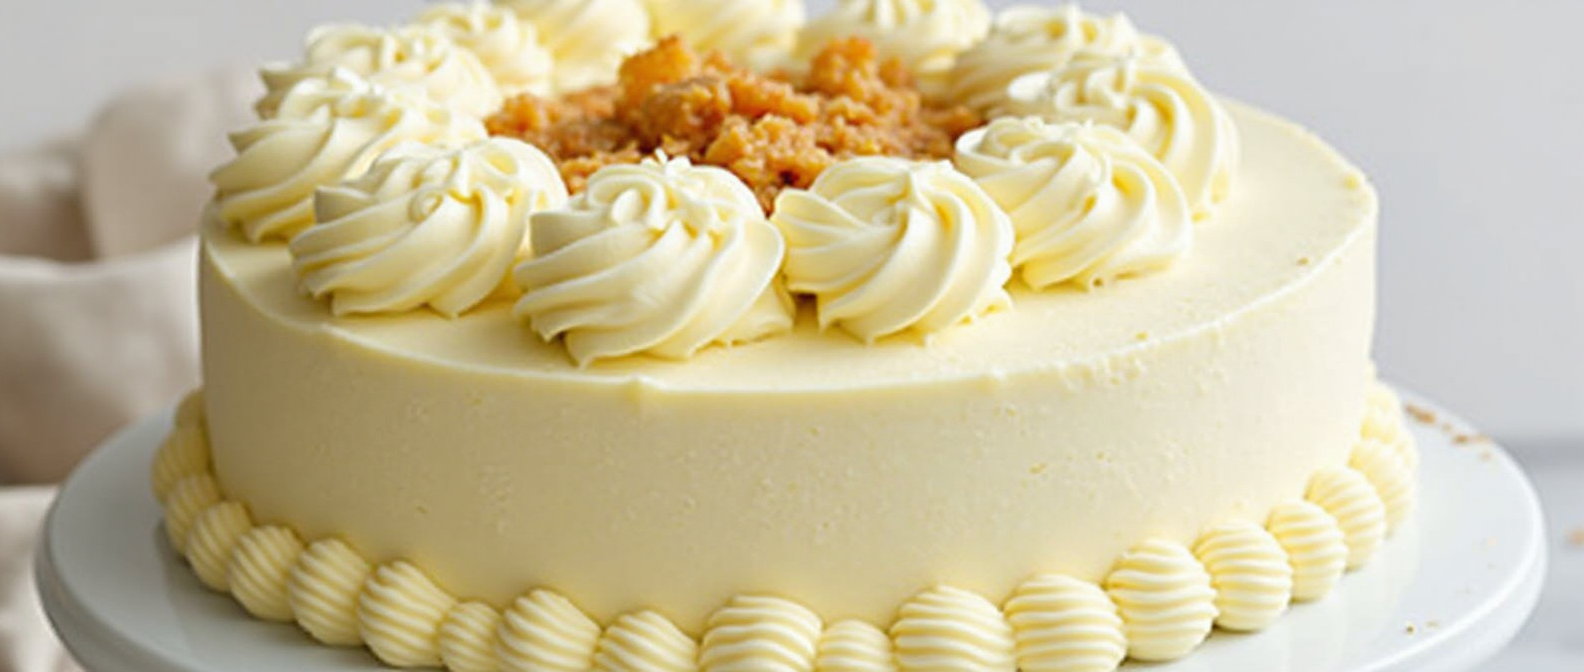
ATK’s Gluten-Free White Chocolate Cake is a delightful, moist, and indulgent dessert that caters to those who follow a gluten-free lifestyle. This cake recipe is carefully crafted to provide the perfect balance of flavor, texture, and richness without the use of traditional wheat flour. Instead, it relies on gluten-free alternatives like rice flour, almond flour, or a pre-made gluten-free flour blend to create a tender crumb. The addition of white chocolate elevates the flavor profile, offering a sweet, creamy taste that complements the cake’s soft texture. This recipe ensures that gluten-free doesn’t mean sacrificing taste, making it ideal for those with dietary restrictions or anyone simply looking for a delicious twist on a classic treat.
Benefits of Gluten-Free Baking
Baking gluten-free offers several benefits beyond accommodating those with gluten sensitivities or celiac disease. For one, gluten-free baked goods often result in lighter, airier textures compared to traditional recipes. The absence of gluten allows the other ingredients, such as eggs, butter, and chocolate, to shine through more prominently. Furthermore, gluten-free recipes can be more inclusive, as they can cater to a wider range of dietary needs, including those with allergies or sensitivities to gluten. Another advantage is that many gluten-free ingredients like almond flour or coconut flour bring additional nutrients to the table, such as healthy fats and protein. Whether you’re baking for a special occasion or simply looking to try something new, gluten-free options like this white chocolate cake provide delicious alternatives that everyone can enjoy, regardless of dietary preferences
Essential Ingredients for ATK’s Gluten-Free White Chocolate Cake
When preparing ATK’s Gluten-Free White Chocolate Cake, choosing the right ingredients is crucial to achieving the perfect flavor and texture. The following list outlines the essential ingredients and offers special notes on each key component, ensuring your cake turns out light, moist, and delicious.
List of Ingredients
- Gluten-Free All-Purpose Flour Blend
The foundation of any gluten-free cake is a quality all-purpose flour blend. Look for a blend that includes rice flour, potato starch, and tapioca flour, which mimics the structure of traditional wheat flour. This combination ensures the cake maintains a soft crumb while avoiding the dense, heavy texture that can sometimes result from gluten-free baking. - White Chocolate
White chocolate is the star ingredient, infusing the cake with a rich and creamy sweetness. Choose high-quality white chocolate, as lower-quality options may contain more sugar and less cocoa butter, affecting the flavor and texture. Ideally, look for white chocolate with at least 30% cocoa butter to achieve the smoothest melt and best flavor. - Granulated Sugar
Granulated sugar sweetens the cake while contributing to its structure. Since gluten-free cakes often need a little extra help with texture, sugar also plays a role in retaining moisture, ensuring the cake isn’t too dry. - Eggs
Eggs help bind the ingredients together and provide structure. They also contribute to the cake’s lift, ensuring it rises properly and has a light, airy texture. For the best results, use room temperature eggs to prevent the batter from curdling when combined with other ingredients. - Baking Powder
Baking powder is essential for providing lift in gluten-free cakes, as it helps the batter rise without the need for gluten. Make sure your baking powder is fresh and free from aluminum, as old baking powder can lead to a flat and dense cake. - Vanilla Extract
A teaspoon of pure vanilla extract enhances the overall flavor profile of the cake, balancing the sweetness of the white chocolate and sugar. Always opt for pure vanilla extract for the best flavor, as imitation versions can have a synthetic taste. - Butter
Unsalted butter adds richness and moisture to the cake, ensuring a tender crumb. It’s important to use unsalted butter to control the salt content in your recipe, giving you more control over the flavor balance. - Milk
Whole milk provides moisture and a creamy texture. If you prefer a dairy-free option, almond milk or oat milk can be used as a substitute without compromising the cake’s overall structure. - Salt
A small pinch of salt helps to balance the sweetness and enhance the other flavors. It’s easy to overlook, but salt plays an important role in elevating the cake’s taste, making all the ingredients work together harmoniously.
Special Notes on Key Ingredients
- Gluten-Free Flour Blend: It’s important to use a blend that includes xanthan gum or guar gum, which acts as a binder to help mimic the elasticity of gluten. Some gluten-free flour blends do not include these, so you may need to add them separately if your blend lacks them.
- White Chocolate: For the smoothest cake, melt the white chocolate gently using a double boiler or microwave, making sure it doesn’t burn. Stirring frequently helps it melt evenly, ensuring the chocolate blends smoothly into the batter.
- Eggs and Dairy: Both eggs and dairy are key for ensuring the proper texture and moisture in gluten-free baking. If you have dietary restrictions, substitutions like flax eggs or non-dairy milk can be used, though the texture and taste may slightly differ.
Step-by-Step Baking Process
Preparation Before Baking
Before diving into the actual baking process, it is essential to prepare your ingredients and kitchen for a smooth experience. This preparation ensures that you won’t be scrambling for ingredients while in the middle of baking.
1. Gather All Ingredients: Start by ensuring that you have all the ingredients needed for the recipe. This includes measuring out flour, sugar, butter, eggs, and any other items required. Having everything ready will save you time and prevent any interruptions.
2. Preheat the Oven: Preheat your oven to the specified temperature. This step is crucial because if you add the batter to a cold oven, the baking time and the final result could be significantly affected.
3. Prepare Baking Pans: While the oven is heating up, prepare your baking pans. Grease the sides and bottom of the pan with butter or oil, then lightly dust with flour. Alternatively, you can use parchment paper for easy removal of the cake after baking. If your recipe requires multiple layers or different shapes, make sure to prepare each pan accordingly.
4. Set Up Your Workspace: Organize your tools and ingredients so everything is within reach. This includes bowls for mixing, measuring cups, spoons, spatulas, a whisk, and a hand mixer or stand mixer if needed. A tidy workspace makes the entire process easier and more efficient.
Detailed Baking Procedure
Once you’ve completed the preparation steps, it’s time to begin the actual baking process.
1. Mix the Dry Ingredients: Start by sifting your dry ingredients together in a separate bowl. This includes flour, baking powder, salt, and any other dry ingredients specified in the recipe. Sifting helps prevent clumps and ensures the dry ingredients are evenly distributed.
2. Cream the Butter and Sugar: In a large mixing bowl, combine butter and sugar. Use an electric mixer on medium speed to cream them together until the mixture becomes light and fluffy. This process is crucial as it incorporates air into the batter, giving your baked good a light texture.
3. Add Eggs and Wet Ingredients: Next, add the eggs one at a time, mixing well after each addition. If the recipe calls for other wet ingredients like vanilla extract, milk, or yogurt, add them now. Be sure to mix the wet ingredients until they are fully incorporated with the butter and sugar mixture.
4. Combine the Wet and Dry Ingredients: Gradually add the dry ingredients to the wet mixture in stages. Start by adding a small amount, mixing gently, and continue until all the dry ingredients are combined with the wet ones. Be careful not to over-mix, as this can lead to a dense texture.
5. Pour the Batter Into the Prepared Pan: Once the batter is smooth and fully mixed, pour it into the prepared baking pan. Use a spatula to spread the batter evenly across the pan, ensuring it’s level.
6. Bake According to Recipe Instructions: Place the pan in the preheated oven and bake according to the recipe’s instructions. Avoid opening the oven door during the first 20 minutes to prevent the batter from collapsing. Use a toothpick or cake tester to check for doneness by inserting it into the center. If it comes out clean or with a few crumbs, your cake is ready.
7. Cool the Cake: After baking, remove the cake from the oven and let it cool in the pan for 10-15 minutes. Then, transfer it to a wire rack to cool completely. This step ensures the cake sets properly and doesn’t become soggy.
By following these detailed steps, you’ll be on your way to baking a delicious cake or dessert every time!
Tips and Tricks for Perfect Execution
When it comes to perfecting your recipes, attention to detail and the ability to adapt to dietary needs can make a world of difference. Here are some tips and tricks for getting everything just right, ensuring your dish is both delicious and suitable for different dietary preferences, while also avoiding common pitfalls.
Adjusting the Recipe for Dietary Needs
In today’s world, many people follow specific dietary requirements for health, ethical, or medical reasons. Fortunately, many recipes can be easily adjusted to accommodate these needs. Here are some ideas for how to make your dish suitable for different diets:
- Gluten-Free: If you’re preparing a dish for someone who avoids gluten, consider substituting traditional wheat flour with gluten-free options like almond flour, rice flour, or a premade gluten-free flour blend. Be mindful that some gluten-free flours require additional binding agents, such as xanthan gum or guar gum, to achieve the right texture.
- Vegan: To make a recipe vegan, swap out animal products for plant-based alternatives. For instance, replace eggs with flaxseed meal or chia seeds mixed with water, which work as excellent binding agents. Dairy can be substituted with plant-based milk (almond, oat, or soy milk) and vegan butter. Additionally, check labels on processed foods to ensure they are free from any animal-derived ingredients.
- Low-Carb/Keto: If you’re following a low-carb or ketogenic diet, you can substitute high-carb ingredients with lower-carb alternatives. For example, use cauliflower rice or zucchini noodles in place of regular rice or pasta. Sweeteners like stevia or monk fruit can replace sugar, while almond flour can be used instead of wheat flour for a keto-friendly option.
- Dairy-Free: Those who are lactose intolerant or allergic to dairy can still enjoy many dishes by choosing non-dairy alternatives. For creamy dishes, consider using coconut milk, soy milk, or oat cream. Nutritional yeast can also be used to add a cheesy flavor without any dairy.
- Nut-Free: For those with nut allergies, replacing nut-based ingredients with seeds (like sunflower or pumpkin seeds) can be a good option. You can also use soy-based alternatives if the recipe calls for nut milk or nut butters.
By making these small yet effective adjustments, you can ensure that your dish meets various dietary needs without compromising on flavor or texture.
Common Mistakes to Avoid
Even the most experienced cooks can make mistakes. However, being aware of common pitfalls can help you avoid them and guarantee the success of your dish:
- Not Measuring Ingredients Accurately: Precision is key, especially when baking. Always use the correct measuring tools for dry and wet ingredients. For dry ingredients like flour, avoid packing it into the measuring cup as this can lead to using too much. Instead, spoon it into the cup and level it off for accuracy.
- Overmixing: Overmixing ingredients, especially when making cakes or batters, can lead to a dense, tough texture. Stir ingredients until they are just combined to ensure a light and fluffy result.
- Under or Overcooking: Cooking times can vary depending on your equipment, the size of your ingredients, and even the type of oven. Always check doneness using a food thermometer or by testing with a fork or toothpick. It’s important to follow the recipe but be ready to adjust based on your specific conditions.
- Using the Wrong Equipment: Not all cookware is created equal. Using the wrong pan or baking dish can alter cooking times and the final result. For example, using a dark-colored pan may cause food to cook faster, while a glass baking dish may heat more slowly than metal. Always ensure you’re using the correct type of equipment.
- Not Tasting as You Go: Taste your dish at different stages to adjust seasoning as needed. Adding salt, pepper, or herbs in increments throughout the cooking process can make a huge difference in the final flavor.
Serving and Storage Suggestions
Recommended Serving Ideas
When it comes to serving your freshly baked cake or dessert, presentation is key to making the experience more enjoyable. Here are some recommended serving ideas that will elevate the enjoyment of your dish:
- Serve with Fresh Fruits: Pair your cake with seasonal fruits such as strawberries, blueberries, or kiwi. These can add a refreshing contrast to the sweetness of the dessert. A few slices of citrus fruits like oranges or lemon zest can enhance the flavor and provide a citrusy kick that balances the richness of the cake.
- Top with Whipped Cream or Frosting: Adding a dollop of freshly whipped cream or a smooth layer of frosting can bring extra richness to the cake. You can also experiment with different flavored whipped creams, such as vanilla, chocolate, or coconut, to complement the taste of the cake. A sprinkle of cocoa powder or powdered sugar can also be added as a final touch.
- Pair with Ice Cream: A slice of cake goes wonderfully with a scoop of vanilla, chocolate, or fruit-flavored ice cream. The combination of warm cake and cold ice cream creates a delightful contrast in temperature and texture. For a more decadent option, consider drizzling some chocolate or caramel sauce over the top.
- Create a Dessert Platter: If you’re serving multiple cakes or desserts, consider creating a dessert platter with different varieties. Small slices of cake can be arranged with cookies, pastries, and chocolates for a more indulgent experience. This is perfect for gatherings or family get-togethers.
- Serve with a Warm Beverage: Pair your cake with a hot beverage like coffee, tea, or hot chocolate. A warm drink complements the dessert perfectly, enhancing its flavor. For added luxury, you can serve a cup of cappuccino or latte with a sprinkle of cinnamon on top to bring out the cake’s flavors.
Proper Storage for Longer Shelf Life
To ensure that your cake stays fresh and delicious for as long as possible, proper storage is essential. Here are some tips for storing your cake so that it maintains its flavor and texture:
- Room Temperature Storage: If you plan to consume the cake within a few days, storing it at room temperature is sufficient. Place the cake in an airtight container or wrap it in plastic wrap to protect it from air and moisture. Avoid exposing the cake to direct sunlight or heat, as it can cause the texture to become dry. Most cakes can be stored at room temperature for 2–3 days.
- Refrigeration for Freshness: For cakes with perishable ingredients, such as cream cheese frosting or fresh fruit, refrigeration is necessary. Store the cake in an airtight container or wrap it tightly with plastic wrap before placing it in the fridge. This will help preserve the cake and prevent it from absorbing odors from other foods. Cakes stored in the refrigerator can last for up to a week, depending on the ingredients.
- Freezing for Long-Term Storage: If you want to store your cake for a longer period, freezing is the best option. Wrap the cake tightly in plastic wrap, then in aluminum foil, or place it in a freezer-safe bag. This method helps preserve the texture and moisture of the cake. Cakes can be frozen for up to 2–3 months. When ready to eat, simply thaw the cake at room temperature or in the fridge overnight before serving.
- Avoid Storing in the Fridge (if unnecessary): While refrigeration is important for certain types of cakes, it’s best to avoid refrigerating cakes that don’t require it, as this can cause the texture to become dry and dense. If the cake contains only dry ingredients or buttercream frosting, storing it at room temperature should suffice.
Frequently Asked Questions about ATK’s Gluten-Free White Chocolate Cake
Answers to Common Queries
1. What makes ATK’s white chocolate cake gluten-free?
ATK’s gluten-free white chocolate cake is made without any wheat flour, replacing it with gluten-free alternatives such as rice flour, potato starch, and cornstarch. These ingredients work together to provide the same texture and taste you’d expect from a traditional cake, but without the gluten.
2. Can I substitute the gluten-free flour blend?
While the recipe uses a specific gluten-free flour blend, it’s important to use a blend that includes xanthan gum or guar gum, which help mimic the structure that gluten provides. If you don’t have the exact blend, you can try other gluten-free flour options, but the texture may vary.
3. Is it necessary to use white chocolate in the cake?
Yes, white chocolate is a key ingredient for the cake’s flavor. It adds a rich sweetness and a smooth texture to the cake. If you prefer a different flavor, you could try using dark or milk chocolate, though it will change the flavor profile of the cake.
4. How can I make this cake dairy-free?
To make this cake dairy-free, substitute the white chocolate with dairy-free white chocolate chips or chunks. Additionally, replace butter with a non-dairy alternative like coconut oil or a plant-based butter substitute.
5. Can I prepare the cake in advance?
Yes, this cake can be made ahead of time. After baking, allow the cake to cool completely, then wrap it tightly in plastic wrap and store it in the fridge for up to 3 days. You can also freeze the cake for up to a month if you’d like to keep it for longer. Just be sure to defrost it before serving.
6. How can I make the cake more flavorful?
If you want to add more flavor, consider incorporating vanilla extract or almond extract into the batter. You could also fold in some fresh berries or citrus zest for a unique twist. Just remember that adding too many wet ingredients could affect the cake’s texture.
Troubleshooting Tips
1. The cake is too dense. What went wrong?
A dense cake could be the result of overmixing the batter or using too much gluten-free flour. Make sure to mix the ingredients until they are just combined, and use a spoon to measure the flour to avoid packing it into the measuring cup. Additionally, ensure you’re using the correct flour blend that is designed for baking cakes.
2. The cake didn’t rise properly. What happened?
If your cake didn’t rise as expected, there could be a few reasons for this. Make sure your baking powder is fresh and hasn’t expired, as old baking powder can cause poor rising. Also, check that you’re not overmixing the batter, which can cause it to collapse during baking.
3. The cake is too dry. How can I fix that?
Dryness can occur when the cake is overbaked or when the flour blend absorbs too much liquid. To avoid this, check the cake a few minutes before the recommended bake time, and insert a toothpick to ensure it comes out moist but not wet. Also, you can try adding an extra egg or a little bit of milk to the batter to improve moisture.
4. The frosting is too runny. What should I do?
If the frosting turns out too runny, it could be due to the temperature of the ingredients or adding too much liquid. Try refrigerating the frosting for 10-15 minutes, then re-whip it. If it’s still runny, add more powdered sugar a little at a time until it reaches the desired consistency.
Conclusion: Enjoying Your Gluten-Free White Chocolate Cake
After dedicating time and effort to crafting the perfect gluten-free white chocolate cake, it’s time to savor the fruits of your labor. The combination of rich, smooth white chocolate with a light, fluffy texture makes this cake a treat that everyone can enjoy, whether or not they follow a gluten-free diet.
Reaping the Rewards of Your Effort
There’s something incredibly satisfying about baking a cake from scratch, and when it turns out as delicious as this gluten-free white chocolate cake, it’s even more rewarding. Each slice of this cake is a delicate balance of sweetness, creaminess, and just the right amount of fluffiness. The gluten-free flour blend provides the structure needed to keep the cake light and airy, while the white chocolate adds a rich depth of flavor that will have your taste buds dancing.
Whether you’re serving it at a special occasion, bringing it to a gathering with friends, or enjoying it as a dessert after dinner, this cake will surely impress. The best part? It’s a treat that doesn’t require any special ingredients that are hard to find. Most gluten-free flours are easily accessible, and white chocolate is a familiar ingredient in many kitchens, making this recipe both practical and indulgent.
By following ATK’s (America’s Test Kitchen) detailed recipe, you’ve created a gluten-free dessert that feels as luxurious as it tastes. You’ve learned how to balance the moisture content with the perfect crumb and how to get just the right level of sweetness without it becoming overwhelming. Your effort in the kitchen has truly paid off in the form of a cake that’s tender, flavorful, and comforting.
Final Thoughts on ATK’s Gluten-Free White Chocolate Cake Recipe
ATK’s gluten-free white chocolate cake recipe stands as a testament to the fact that gluten-free baking doesn’t have to be difficult or bland. With a few simple substitutions and a little patience, you can create a cake that rivals any traditional white chocolate cake. The texture is light, the flavor is rich, and the finished product is as beautiful as it is delicious.
If you’re a seasoned baker or just starting out in the gluten-free world, this recipe provides a reliable foundation for future creations. The use of quality ingredients and precise steps ensures that the cake comes out perfect every time, making it a fantastic addition to your baking repertoire. Whether you follow a gluten-free diet or simply want to share a tasty dessert with friends or family, this cake will be a hit at any gathering.
In the end, enjoying your homemade gluten-free white chocolate cake is a celebration of not only the baking process but also the joy of indulging in a treat that meets everyone’s dietary needs without compromising on taste or texture. So go ahead, take a bite, and relish in the success of your gluten-free baking adventure.