
Prolific Oven Chocolate Orange Almond Cake Recipe: A Decadent Delight
Table of Contents
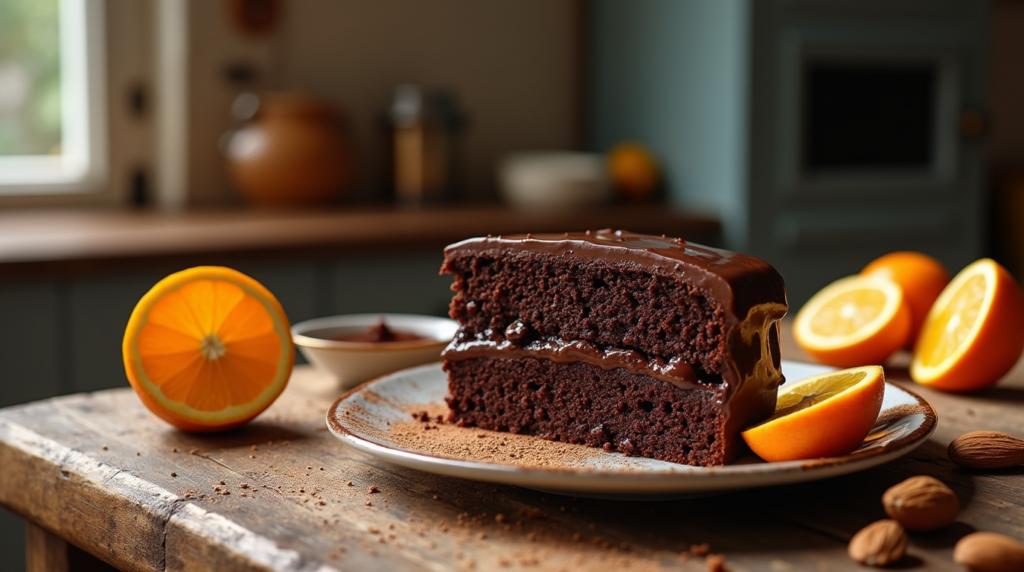
Welcome to a delightful culinary journey where rich chocolate meets vibrant orange and nutty almonds in perfect harmony. If you’re searching for a Prolific Oven Chocolate Orange Almond Cake Recipe that combines decadence with ease, you’ve come to the right place. This moist and flavorful cake is not only a treat for your taste buds but also a stunning centerpiece for any occasion, whether it’s a festive celebration, a cozy family gathering, or a special dessert to impress your guests.
What sets this Prolific Oven dessert apart is the seamless blend of high-quality dark chocolate, freshly zested oranges, and finely ground almond flour, creating a rich and tangy flavor profile that’s both indulgent and sophisticated. Whether you’re an experienced baker or a novice in the kitchen, our step-by-step guide ensures that you can effortlessly create this decadent delight with confidence.
In this blog post, you’ll discover all the essential ingredients, detailed baking instructions, and insider tips to achieve the perfect texture and flavor. Additionally, we’ll explore variations and serving suggestions to customize the cake to your liking, making it a versatile addition to your recipe repertoire. So, preheat your oven and get ready to bake a prolific oven chocolate orange almond cake that will leave everyone asking for seconds!
Ingredients You’ll Need for a Decadent Chocolate Orange Almond Cake
Creating the perfect Prolific Oven Chocolate Orange Almond Cake starts with selecting the right ingredients. Each component plays a crucial role in achieving the moist, rich, and flavorful profile that makes this cake a decadent delight. Below, we break down the essential ingredients, baking essentials, optional additions, and the necessary tools and equipment to ensure your baking experience is seamless and successful.
1. Essential Ingredients
Dark Chocolate: Importance of Quality and Cocoa Percentage
The foundation of any great chocolate cake is high-quality dark chocolate. Opting for chocolate with a cocoa percentage of 70% or higher ensures a deep, rich flavor that stands up beautifully against the bright notes of orange and the nuttiness of almonds. Higher cocoa content not only intensifies the chocolate taste but also contributes to the cake’s moisture and texture. Avoid using chocolate chips or lower-quality chocolate, as they can introduce unwanted sweetness and affect the cake’s overall balance.
Almond Flour vs. All-Purpose Flour: Benefits of Using Almond Flour for Texture and Flavor
Almond flour is a key ingredient that elevates this cake to a gourmet level. Unlike all-purpose flour, almond flour adds a subtle nutty flavor and a tender crumb, enhancing both the taste and texture of the cake. Additionally, almond flour is naturally gluten-free, making this recipe suitable for those with gluten sensitivities. It also contributes to the cake’s moisture, preventing it from becoming dry. When substituting almond flour for all-purpose flour, ensure you use finely ground almond meal to achieve the best results.
Fresh Oranges: Role of Fresh Orange Juice and Zest in Enhancing Flavor
Fresh oranges are essential for imparting a vibrant, tangy flavor that balances the richness of the chocolate and almonds. The zest of the orange provides intense citrus oils that infuse the cake with a bright aroma and flavor, while the fresh orange juice adds moisture and a subtle sweetness. Using fresh oranges instead of bottled juice ensures a more authentic and lively citrus profile, enhancing the overall complexity of the cake.
2. Baking Essentials
Unsalted Butter and Eggs: How They Contribute to the Cake’s Richness and Structure
Unsalted butter is preferred in baking as it allows you to control the salt content, ensuring a balanced flavor. Butter contributes to the cake’s richness and moisture, creating a tender crumb and enhancing the overall flavor profile. Eggs play a dual role by providing structure and stability to the cake through their protein content, while also adding moisture and richness. They help bind the ingredients together, ensuring a uniform texture and preventing the cake from becoming too crumbly.
Baking Powder and Vanilla Extract: Their Roles in Leavening and Adding Depth to the Flavor
Baking powder is a crucial leavening agent that helps the cake rise, resulting in a light and airy texture. It reacts with the wet ingredients to produce carbon dioxide bubbles, which expand during baking, giving the cake its desirable volume. Vanilla extract complements the chocolate and orange flavors by adding depth and complexity. A good-quality vanilla extract enhances the overall taste, tying all the flavors together harmoniously without overpowering the other ingredients.
3. Optional Additions
Chocolate Ganache or Orange Glaze: Ideas for Frosting and Decorating
Enhance your Prolific Oven Chocolate Orange Almond Cake with a luscious chocolate ganache or a tangy orange glaze. Chocolate ganache provides a rich, glossy finish that intensifies the chocolate flavor, making it perfect for a decadent dessert. On the other hand, an orange glaze adds a zesty contrast, highlighting the citrus notes and adding a beautiful sheen to the cake. Both options are versatile and can be tailored to your personal taste preferences, allowing you to customize the cake’s appearance and flavor.
Nuts and Seeds: Suggestions for Adding Crunch, Such as Sliced Almonds or Chia Seeds
Adding nuts and seeds not only enhances the cake’s texture but also boosts its nutritional value. Sliced almonds are a natural choice, reinforcing the almond flavor and providing a satisfying crunch. Chia seeds can be sprinkled on top for an extra layer of texture and a subtle nutritional boost, adding fiber and omega-3 fatty acids. These additions make the cake more interesting and visually appealing, offering a delightful contrast to the soft, moist interior.
4. Tools and Equipment
Cake Pans and Mixing Bowls: Importance of Proper Equipment for Baking
Using the right cake pans is essential for ensuring even baking and achieving the desired cake shape. Opt for high-quality, non-stick pans or line your pans with parchment paper to prevent sticking and ensure easy removal of the cake. Mixing bowls are equally important, providing a stable environment for combining ingredients. Stainless steel or glass bowls are preferred as they don’t react with acidic ingredients like orange juice, maintaining the integrity of your batter.
Measuring Tools: Ensuring Accurate Measurements for Consistent Results
Precision is key in baking, making accurate measuring tools indispensable. Use a digital kitchen scale for precise measurements of ingredients, especially for dry components like almond flour and cocoa powder. Measuring cups and spoons are necessary for liquids and smaller quantities, ensuring you add the right amount of each ingredient. Accurate measurements guarantee consistent results, leading to a perfectly balanced and delicious cake every time.
Oven and Cooling Racks: Tips for Optimal Baking and Cooling
A reliable oven is fundamental to successful baking. Ensure your oven is properly calibrated to maintain the correct temperature, as fluctuations can affect the cake’s rise and texture. Cooling racks are essential for allowing the cake to cool evenly, preventing it from becoming soggy by allowing excess moisture to evaporate. Proper cooling ensures that the cake maintains its structure and is ready for frosting or glazing without becoming dense or overly moist.
tep-by-Step Guide to Baking the Perfect Chocolate Orange Almond Cake
Creating a Prolific Oven Chocolate Orange Almond Cake that is both moist and decadent involves careful preparation and precise execution. Follow this comprehensive, step-by-step guide to ensure your cake turns out perfectly every time. Whether you’re an experienced baker or a novice, these instructions will help you achieve a rich and flavorful dessert that impresses your guests.
1. Preparing Your Ingredients
Measuring and Sifting: Importance of Accurate Measurements and Sifting Dry Ingredients
Precision is key in baking, and accurate measurements ensure that your chocolate orange almond cake has the perfect balance of flavors and textures. Here’s how to get it right:
- Use a Digital Kitchen Scale: For the most accurate measurements, especially for dry ingredients like almond flour and cocoa powder. A scale eliminates the inconsistencies of volume measurements.
- Measure Ingredients Carefully: Spoon flour into measuring cups and level off with a knife to avoid packing, which can lead to too much flour and a dense cake.
- Sift Dry Ingredients: Sifting ingredients such as all-purpose flour, baking powder, and cocoa powder removes lumps and aerates the mixture, resulting in a lighter, more even batter. This step is crucial for achieving a moist and fluffy texture in your cake.
Sifting Process:- Combine Dry Ingredients: Place all-purpose flour, baking powder, and cocoa powder into a large bowl.
- Sift Together: Use a fine-mesh sieve or a sifter to blend the ingredients thoroughly, breaking up any clumps.
- Set Aside: Once sifted, set the dry mixture aside until you’re ready to incorporate it into the batter.
Zesting and Juicing Oranges: How to Properly Zest and Juice for Maximum Flavor
Fresh oranges are essential for the vibrant, tangy flavor that complements the rich chocolate and almonds in your cake. Properly zesting and juicing your oranges ensures maximum flavor extraction.
- Zesting Oranges:
- Choose Fresh Oranges: Select firm, brightly colored oranges for the best zest.
- Use a Microplane or Zester: Gently grate the outer peel of the orange, avoiding the white pith, which can be bitter.
- Measure Zest: For this recipe, you’ll need the zest of 2 oranges. The zest adds intense citrus oils that enhance the cake’s aroma and flavor.
- Juicing Oranges:
- Roll Before Juicing: Gently roll the oranges on the countertop with your palm to soften them, making them easier to juice.
- Use a Citrus Juicer: Extract fresh orange juice using a manual or electric juicer to ensure no bitterness from the pith gets into your juice.
- Measure Juice: You’ll need 60ml (1/4 cup) of fresh orange juice. Fresh juice provides a vibrant, authentic citrus flavor that bottled juices can’t match.
2. Mixing the Batter
Creaming Butter and Sugar: Techniques for Achieving a Light and Fluffy Mixture
Creaming is a fundamental baking technique that incorporates air into your mixture, resulting in a light and fluffy cake.
- Room Temperature Butter: Ensure your unsalted butter is at room temperature. Softened butter blends more easily with sugar, creating a smoother mixture.
- Creaming Process:
- Combine Butter and Sugar: In a large mixing bowl, beat 150g unsalted butter and 150g sugar together using an electric mixer on medium speed.
- Beat Until Light and Pale: Continue mixing for about 3-5 minutes until the mixture becomes creamy, light in color, and fluffy. This aeration is crucial for a tender cake texture.
- Tips:
- Avoid Overbeating: Over-creaming can cause the butter to become too soft, leading to a greasy batter.
- Use the Right Bowl: A large, clean mixing bowl allows for maximum aeration during creaming.
Incorporating Eggs and Vanilla: Ensuring Even Distribution Without Overmixing
Adding eggs and vanilla extract enriches the cake’s flavor and structure. Proper incorporation is essential to maintain the batter’s lightness.
- Adding Eggs:
- One at a Time: Add 3 large eggs, one at a time, to the creamed butter and sugar mixture.
- Beat Well After Each Addition: Ensure each egg is fully incorporated before adding the next to maintain the emulsion and prevent the batter from curdling.
- Adding Vanilla Extract:
- Measure Accurately: Add 1 teaspoon of high-quality vanilla extract to enhance the overall flavor profile.
- Mix Gently: Blend the vanilla into the batter until just combined, avoiding overmixing.
- Tips:
- Room Temperature Eggs: Use eggs at room temperature to ensure they blend smoothly with the butter mixture.
- Avoid Overmixing: Mix until ingredients are just combined to prevent developing too much gluten, which can make the cake dense.
Folding in Dry Ingredients: Tips to Maintain a Moist and Rich Texture
Incorporating dry ingredients carefully ensures the cake remains moist and rich without becoming heavy.
- Combine Dry Ingredients Separately: Before adding to the batter, ensure that your sifted almond flour and all-purpose flour mixture is thoroughly combined.
- Folding Technique:
- Add Dry Ingredients in Batches: Gradually add the sifted dry ingredients to the wet batter in three parts.
- Use a Spatula: Gently fold the mixture using a spatula with a cutting and folding motion to preserve the airiness.
- Avoid Overmixing: Stop folding as soon as the dry ingredients are just incorporated. Overmixing can lead to a dense cake texture.
- Tips:
- Scrape the Bowl: Ensure all the dry ingredients are fully incorporated by scraping down the sides of the bowl periodically.
- Consistency: The final batter should be smooth and slightly thick but still pourable.
3. Baking Process
Preheating the Oven: Setting the Right Temperature for Even Baking
Preheating your oven ensures that your cake bakes evenly and rises properly.
- Set the Correct Temperature: Preheat your oven to 180°C (350°F). This temperature is ideal for baking cakes, allowing them to rise without burning the edges.
- Use an Oven Thermometer: To ensure accuracy, use an oven thermometer, as built-in thermostats can sometimes be inaccurate. Consistent temperature is crucial for a perfectly baked cake.
- Positioning the Racks: Place the oven rack in the center position to allow even heat distribution around the cake pans.
- Tips:
- Avoid Opening the Oven Door Early: Opening the door too soon can cause the cake to sink. Only check for doneness towards the end of the baking time.
- Preheat Fully: Allow the oven to reach the set temperature before placing the cake inside.
Pouring and Leveling the Batter: Ensuring a Smooth, Even Surface in the Cake Pans
Properly pouring and leveling the batter ensures uniform baking and a professional appearance.
- Prepare Cake Pans:
- Grease the Pans: Use unsalted butter to generously grease your cake pans.
- Line with Parchment Paper: For easier removal, line the bottom of each pan with parchment paper after greasing.
- Pouring the Batter:
- Divide Evenly: Use a large spoon or a spatula to divide the batter evenly between the prepared pans.
- Smooth the Surface: Gently tap the pans on the counter to release any large air bubbles and smooth the top with a spatula.
- Tips:
- Use a Measuring Cup: Ensure each pan receives the same amount of batter for even baking.
- Fill to the Right Level: Fill each pan about 2/3 full to allow space for the cake to rise without overflowing.
Baking Time and Testing: How to Know When the Cake is Perfectly Baked Using a Toothpick Test
Baking time can vary based on oven accuracy and pan size. Knowing when your cake is done is essential to prevent overbaking.
- Estimated Baking Time: Bake the cake for 25-30 minutes at 180°C (350°F). Start checking for doneness at the 25-minute mark.
- Toothpick Test:
- Insert a Toothpick: Insert a clean toothpick or cake tester into the center of the cake.
- Check for Cleanliness: If it comes out with a few moist crumbs, the cake is done. If it comes out with wet batter, continue baking for a few more minutes.
- Avoid Overbaking: Remove the cake as soon as the toothpick comes out clean to maintain moisture.
- Cooling Time: Allow the cakes to cool in the pans for 10 minutes before transferring to a cooling rack to cool completely.
- Baking Time Table:
| Pan Size | Baking Temperature | Baking Time |
| 8-inch Round Pan | 180°C (350°F) | 25-30 minutes |
| 9-inch Round Pan | 180°C (350°F) | 20-25 minutes |
| Loaf Pan (9×5 inch) | 180°C (350°F) | 35-40 minutes |
Note: Baking times may vary based on your oven’s accuracy and the specific pan used. Always perform the toothpick test to ensure doneness.
4. Cooling and Frosting
Cooling Properly: Importance of Cooling on Racks to Prevent Sogginess
Proper cooling is essential to maintain the cake’s structure and texture before frosting.
- Remove from Pans Promptly: After baking, allow the cakes to cool in the pans for 10 minutes. This short cooling period helps the cakes firm up slightly, making them easier to remove.
- Transfer to Cooling Racks:
- Carefully Remove Cakes: Gently run a knife around the edges of the pans to loosen the cakes.
- Invert and Release: Place the cakes upside down on the cooling racks to cool completely, which usually takes about 1 hour.
- Avoid Covering: Do not cover the cakes while they are cooling to prevent condensation from making them soggy.
- Tips:
- Allow Complete Cooling: Ensure the cakes are completely cool before frosting to prevent the frosting from melting.
- Stabilize Layers: If the cakes are domed, level them with a serrated knife for a flat surface, ensuring even stacking.
Applying Ganache or Glaze: Step-by-Step Instructions for Frosting the Cake
Frosting your cake with a chocolate ganache or orange glaze adds both flavor and visual appeal. Here’s how to do it:
Chocolate Ganache:
Ingredients:
- 200g Dark Chocolate, finely chopped
- 200ml Heavy Cream
- 2 tablespoons Unsalted Butter (optional, for extra shine)
Instructions:
- Heat the Cream: In a small saucepan, bring the heavy cream to a simmer over medium heat. Do not let it boil.
- Pour Over Chocolate: Place the finely chopped dark chocolate in a heatproof bowl. Pour the hot cream over the chocolate.
- Let Sit: Allow the mixture to sit for 5 minutes to soften the chocolate.
- Stir Until Smooth: Gently stir the mixture until the chocolate is completely melted and the ganache is smooth. If using, add the unsalted butter and stir until incorporated.
- Cool Slightly: Let the ganache cool until it thickens to a spreadable consistency.
- Frost the Cake: Spread the ganache evenly over the top and sides of the cooled cake using an offset spatula.
Orange Glaze:
Ingredients:
- 1 cup Powdered Sugar
- 2-3 tablespoons Fresh Orange Juice
- 1 teaspoon Orange Zest (optional)
Instructions:
- Mix Ingredients: In a medium bowl, whisk together powdered sugar and fresh orange juice until smooth. Add orange zest for extra flavor.
- Adjust Consistency: Add more orange juice if the glaze is too thick or more powdered sugar if it’s too thin.
- Apply Glaze: Pour the glaze over the top of the cooled cake, allowing it to drip down the sides for a beautiful finish.
- Let Set: Allow the glaze to set before serving to ensure it hardens slightly.
- Tips:
- Smooth Application: Use a spatula to spread the ganache or glaze evenly, covering all sides of the cake.
- Temperature Control: Ensure the ganache is not too hot when applying to prevent it from melting the cake or the glaze becoming too runny.
Decorating Tips: Adding Final Touches Like Orange Slices or Almond Slivers
Final decorations enhance the cake’s appearance and add an extra layer of flavor and texture.
- Orange Slices:
- Fresh Slices: Thinly slice a fresh orange and arrange the slices elegantly on top of the cake or around the base for a vibrant, citrusy touch.
- Candied Slices: For a decorative and sweet addition, candy orange slices by simmering them in a sugar syrup until translucent, then let them dry before placing on the cake.
- Almond Slivers:
- Toasted Almonds: Lightly toast sliced almonds in a dry skillet over medium heat until golden brown. This enhances their flavor and adds a crunchy texture.
- Sprinkle on Top: Scatter the toasted almond slivers over the ganache or glaze for a beautiful contrast in both color and texture.
- Additional Decorations:
- Cocoa Powder Dusting: Lightly dust the top of the cake with cocoa powder using a fine sieve for a sophisticated finish.
- Edible Flowers: Add a touch of elegance with edible flowers that complement the cake’s colors and flavors.
- Chocolate Shavings: Use a vegetable peeler to create delicate chocolate shavings from a bar of dark chocolate and sprinkle them over the top.
- Presentation Tips:
- Layered Look: If you have multiple layers, frost each layer individually before stacking to create a seamless, professional appearance.
- Uniform Decoration: Ensure that all decorative elements are evenly distributed to maintain a balanced and attractive look.
Tips for Achieving a Moist and Rich Texture
Creating a Prolific Oven Chocolate Orange Almond Cake that boasts a moist and rich texture requires attention to detail and an understanding of how each ingredient and technique contributes to the final product. Here are essential tips to ensure your cake turns out perfectly every time:
1. Choosing the Right Chocolate for prolific oven chocolate orange almond cake recipe
Quality Matters: How High-Quality Dark Chocolate Enhances Flavor and Texture
The quality of chocolate you use plays a pivotal role in both the flavor and texture of your cake. Here’s why opting for high-quality dark chocolate is essential:
- Flavor Intensity: High-quality dark chocolate (70% cocoa or higher) provides a deep, robust chocolate flavor that stands out without being overly sweet. This balance is crucial for complementing the bright citrus notes from the orange and the nuttiness of almonds.
- Smooth Texture: Premium chocolate melts smoothly and integrates seamlessly into the batter, ensuring a consistent texture throughout the cake. Lower-quality chocolates may contain additives or have inconsistent melting properties, leading to a grainy or uneven texture.
- Moisture Contribution: Good quality dark chocolate contributes to the cake’s moisture. High cocoa content means more cocoa butter, which adds richness and helps maintain the cake’s tenderness.
Recommendation:
- Brands to Consider: Look for reputable brands like Valrhona, Ghirardelli, or Lindt, which offer high cocoa percentage chocolates suitable for baking.
- Avoid Substitutes: Stay away from chocolate chips or bars with additives like vegetable oils, which can alter the cake’s texture and flavor.
Melting Techniques: Best Practices for Melting Chocolate Without Burning
Properly melting chocolate is crucial to maintaining its smoothness and preventing bitterness from burning. Follow these best practices to achieve the perfect melted chocolate:
- Double Boiler Method:
- Setup: Fill a saucepan with about an inch of water and bring it to a gentle simmer. Place a heatproof bowl on top, ensuring it doesn’t touch the water.
- Add Chocolate: Break the dark chocolate into uniform pieces and add them to the bowl.
- Stir Continuously: Gently stir the chocolate with a silicone spatula or wooden spoon until fully melted and smooth.
- Remove from Heat: Once melted, remove the bowl from the saucepan to prevent residual heat from cooking the chocolate further.
- Microwave Method:
- Chop Chocolate Evenly: Break the chocolate into small, uniform pieces for even melting.
- Microwave in Intervals: Place the chocolate in a microwave-safe bowl and heat on medium power in 20-30 second intervals.
- Stir Between Intervals: After each interval, stir the chocolate thoroughly to distribute heat and prevent hotspots.
- Finish Melting: Continue until the chocolate is almost fully melted, then stir until smooth.
Tips:
- Avoid Moisture: Ensure all utensils and bowls are completely dry. Even a drop of water can cause the chocolate to seize, turning it grainy and unusable.
- Low and Slow: Use low heat to melt chocolate gradually, preventing it from burning or seizing.
- Smooth Consistency: The melted chocolate should be glossy and smooth. If it appears dull or has lumps, continue gentle stirring until fully melted.
2. Balancing Ingredients
Sugar and Fat Ratios: Ensuring the Right Sweetness and Richness
Balancing sugar and fat is essential for achieving a cake that is both sweet and rich without being overly heavy or dry. Here’s how to manage these ratios effectively:
- Sugar Balance:
- Sweetness Level: Using the right amount of sugar ensures the cake has a pleasant sweetness that complements the bitter notes of dark chocolate and the tanginess of orange.
- Texture Contribution: Sugar not only sweetens but also helps retain moisture in the cake, contributing to its moist texture.
- Fat Balance:
- Richness and Tenderness: Fat from unsalted butter and almond flour provides the cake with its rich flavor and tender crumb. It also contributes to the overall moistness by coating the flour proteins, preventing gluten formation.
- Avoiding Overuse: While fat is necessary, too much can make the cake greasy and overly dense. Stick to the recipe’s recommended quantities to maintain balance.
Pro Tip:
- Adjusting Sweetness: If you prefer a less sweet cake, you can reduce the sugar by up to 10% without significantly affecting the texture. However, be cautious as sugar also affects moisture retention and browning.
Maintaining Moisture: Role of Orange Juice and Proper Mixing in Moisture Retention
Moisture is a key factor in creating a delightful cake. Here’s how orange juice and mixing techniques help maintain it:
- Orange Juice:
- Natural Moisture: Fresh orange juice adds liquid to the batter, contributing to the cake’s moistness. It also imparts a subtle citrus flavor that enhances the overall taste.
- Acidity Balance: The acidity in orange juice reacts with baking powder, helping the cake rise and stay light.
- Proper Mixing:
- Gentle Incorporation: Mixing the batter just until the ingredients are combined prevents the development of excessive gluten, which can make the cake tough and dry.
- Folding Technique: Using a folding motion to combine dry and wet ingredients ensures that air remains in the batter, contributing to a lighter texture while maintaining moisture.
Additional Tips:
- Oil Alternatives: Incorporating a small amount of oil (like vegetable oil) can further enhance moisture, but ensure it doesn’t overpower the cake’s flavor.
- Buttermilk Substitute: If the recipe allows, using buttermilk instead of regular milk can add tanginess and moisture due to its acidic nature.
3. Avoiding Common Mistakes
Overmixing the Batter: How It Can Lead to a Dense Cake and How to Prevent It
Overmixing the batter is a common baking mistake that can result in a dense, tough cake. Here’s how to avoid it:
- Why Overmixing is a Problem:
- Gluten Development: Excessive mixing leads to the development of gluten in the flour, making the cake’s crumb tight and chewy rather than light and tender.
- Air Loss: Overmixing can cause the batter to lose the incorporated air, resulting in a heavier texture.
- How to Prevent Overmixing:
- Mix Until Just Combined: Once you add the dry ingredients to the wet mixture, mix only until there are no visible streaks of flour. The batter should be smooth but still slightly lumpy.
- Use Gentle Folding: Employ a folding motion with a spatula rather than vigorous stirring or beating to incorporate ingredients without overworking the batter.
- Scrape the Bowl: Periodically scrape down the sides of the mixing bowl to ensure even distribution without overmixing.
Pro Tip:
- Temperature Awareness: Ensure all ingredients, especially eggs and butter, are at room temperature. This allows for easier incorporation and reduces the need for excessive mixing.
Incorrect Oven Temperature: Tips for Accurate Temperature Control and Checking Your Oven’s Calibration
Baking at the correct temperature is crucial for even cooking and achieving the desired cake texture. Here’s how to ensure your oven is set correctly:
- Accurate Temperature Control:
- Preheat Properly: Always preheat your oven to the exact temperature specified in the recipe before placing the cake inside.
- Avoid Frequent Door Opening: Opening the oven door frequently can cause temperature fluctuations, leading to uneven baking.
- Checking Oven Calibration:
- Use an Oven Thermometer: Invest in a reliable oven thermometer to check if your oven’s actual temperature matches the set temperature. Place the thermometer in the center of the oven to get an accurate reading.
- Adjust if Necessary: If you find a discrepancy between the set and actual temperatures, adjust your oven settings accordingly or note the difference for future baking sessions.
Tips:
- Consistent Heat Distribution: Place the cake pans in the center of the oven to ensure even heat distribution around all sides.
- Avoid Overloading: Don’t overcrowd the oven with multiple pans or dishes, as this can obstruct airflow and affect baking temperature.
4. Enhancing Flavor Profiles
Using Fresh Ingredients: Importance of Fresh Orange Zest and Juice for Vibrant Flavor
Fresh ingredients are the cornerstone of a flavorful cake. Here’s why using fresh orange zest and juice is essential:
- Orange Zest:
- Intense Aroma: Freshly grated orange zest contains essential oils that provide a vibrant, aromatic citrus flavor, enhancing the cake’s overall taste.
- Avoid Bitterness: Ensure you only zest the outer orange peel, avoiding the white pith underneath, which can introduce bitterness.
- Fresh Orange Juice:
- Authentic Flavor: Freshly squeezed orange juice offers a natural sweetness and tanginess that bottled juices can’t replicate, adding depth to the cake’s flavor profile.
- Moisture Contribution: As mentioned earlier, fresh orange juice adds necessary moisture, contributing to the cake’s moist texture.
Pro Tip:
- Organic Oranges: If possible, use organic oranges to ensure the zest is free from pesticides and has a pure, natural flavor.
Adding Extracts: How Almond Extract Complements the Overall Taste
Extracts are potent flavor enhancers that can elevate your cake’s taste. Here’s how almond extract plays a role:
- Flavor Enhancement:
- Complementary Taste: Almond extract adds a subtle, nutty flavor that complements the almond flour and enhances the cake’s overall flavor profile without overpowering the other ingredients.
- Depth and Complexity: The addition of almond extract introduces a layer of complexity, making the cake’s flavor more nuanced and sophisticated.
- Usage Tips:
- Measure Accurately: Use the exact amount specified in the recipe (typically 1 teaspoon) to avoid an overpowering almond flavor.
- Quality Matters: Choose a high-quality pure almond extract for the best flavor. Avoid imitation extracts, which can have artificial tastes.
Additional Extract Suggestions:
- Vanilla Extract: If desired, a splash of vanilla extract can further enhance the cake’s flavor, adding warmth and sweetness that complements both chocolate and orange.
Variations and Serving Suggestions
One of the joys of baking is the ability to customize recipes to suit your preferences and dietary needs. The Prolific Oven Chocolate Orange Almond Cake is no exception. Whether you’re catering to dietary restrictions, looking to enhance flavors, or seeking creative serving ideas, these variations and suggestions will help you tailor the cake to your liking.
1. Dietary Modifications
Gluten-Free Option: Substituting All-Purpose Flour with a Gluten-Free Blend
For those with gluten sensitivities or celiac disease, creating a gluten-free version of this cake is both possible and delicious.
- Choosing the Right Gluten-Free Flour Blend:
- All-Purpose Gluten-Free Flour: Opt for a reputable brand like King Arthur or Bob’s Red Mill that offers a balanced blend suitable for baking.
- Xanthan Gum: Ensure your flour blend contains xanthan gum or add 1/2 teaspoon per cup of gluten-free flour to help with structure and elasticity.
- Adjusting the Recipe:
- Flour Measurement: Use the same measurement as the original recipe, but always check the specific blend’s instructions as some may require slight adjustments.
- Additional Moisture: Gluten-free flours can sometimes make cakes dry. Consider adding an extra 2 tablespoons of orange juice or a tablespoon of applesauce to maintain moisture.
- Baking Tips:
- Allow Proper Mixing: Gluten-free batters benefit from thorough mixing to ensure all ingredients are well incorporated.
- Resting the Batter: Letting the batter sit for 10 minutes before baking can help hydrate the gluten-free flours, resulting in a better texture.
Vegan Adaptation: Using Plant-Based Butter and Egg Substitutes for a Vegan-Friendly Cake
Creating a vegan version of this cake ensures everyone can enjoy its rich flavors without compromising dietary choices.
- Substituting Unsalted Butter:
- Plant-Based Margarine or Vegan Butter: Use an equal amount of high-quality vegan butter, such as Earth Balance or Miyoko’s, to replicate the richness and moisture.
- Egg Replacements:
- Flax Eggs: Mix 1 tablespoon of ground flaxseed with 3 tablespoons of water for each egg. Let it sit for 5 minutes until it gels.
- Applesauce: Replace each egg with 1/4 cup of unsweetened applesauce to add moisture and binding.
- Aquafaba: Use 3 tablespoons of chickpea brine (aquafaba) to mimic the binding properties of eggs.
- Additional Considerations:
- Vegan Vanilla Extract: Ensure your vanilla extract is free from animal products.
- Check Other Ingredients: Verify that all other ingredients, such as baking powder and cocoa powder, are vegan-friendly.
- Baking Tips:
- Monitor Moisture Levels: Vegan substitutes can alter the cake’s moisture, so adjust liquid ingredients if necessary to maintain the desired texture.
- Chill the Batter: Letting the batter rest in the refrigerator for 30 minutes can improve the cake’s structure and prevent excessive spreading.
2. Flavor Enhancements
Adding Nuts: Incorporating Sliced Almonds or Other Nuts for Added Texture
Enhancing your cake with additional nuts not only boosts the nutritional value but also adds delightful textures and flavors.
- Types of Nuts to Add:
- Sliced Almonds: Enhance the almond flavor and provide a satisfying crunch.
- Pecans or Walnuts: Introduce a deeper, buttery flavor that complements the chocolate and orange.
- Hazelnuts: Add a unique nutty taste that pairs well with chocolate.
- Incorporation Methods:
- Folding into the Batter: Gently fold in 1/2 to 1 cup of your chosen nuts after adding the dry ingredients to distribute them evenly without overmixing.
- Topping the Cake: Sprinkle toasted nuts on top of the ganache or glaze for an appealing finish and extra crunch.
- Toasting Nuts:
- Enhance Flavor: Lightly toast nuts in a dry skillet over medium heat for 3-5 minutes, stirring frequently until fragrant and golden brown.
- Cool Before Using: Allow nuts to cool completely before adding to the batter or topping to maintain their crunchiness.
Infusing Spices: Introducing Spices Like Cinnamon or Cardamom for a Unique Twist
Adding spices can elevate the cake’s flavor profile, introducing warmth and complexity.
- Suggested Spices:
- Cinnamon: Adds a sweet and spicy note that complements the chocolate and orange.
- Cardamom: Introduces a floral and slightly citrusy flavor that enhances the cake’s vibrancy.
- Nutmeg: Offers a warm and nutty undertone that pairs well with the rich ingredients.
- How to Incorporate:
- Amount: Add 1/2 teaspoon of your chosen spice(s) to the dry ingredients to ensure even distribution without overpowering the primary flavors.
- Combination: Experiment with combinations, such as 1/4 teaspoon cinnamon and 1/4 teaspoon cardamom, to create a balanced spice profile.
- Baking Tips:
- Fresh Spices: Use freshly ground spices for the most intense and vibrant flavors.
- Taste as You Go: Start with smaller amounts and adjust according to your preference to prevent the spices from dominating the cake’s flavor.
3. Serving Ideas
Pairing with Ice Cream: Best Ice Cream Flavors to Complement the Cake
Serving your Chocolate Orange Almond Cake with ice cream can enhance the dessert experience by adding contrasting textures and temperatures.
- Recommended Ice Cream Flavors:
- Vanilla Bean: Its creamy and neutral flavor balances the rich chocolate and bright orange.
- Orange Sorbet: Reinforces the citrus notes and adds a refreshing contrast.
- Salted Caramel: Introduces a sweet and salty element that complements the cake’s sweetness.
- Espresso or Coffee: Enhances the chocolate flavor with a robust, bitter contrast.
- Serving Suggestions:
- Scoop Placement: Place a generous scoop of ice cream alongside a slice of cake for a classic presentation.
- Drizzles: Add a drizzle of warm chocolate sauce or orange syrup over the ice cream and cake for extra indulgence.
- Temperature Contrast: Ensure the ice cream is slightly softened for easier scooping and a pleasant temperature contrast with the cake.
Garnishing Options: Fresh Orange Slices, Whipped Cream, or a Dusting of Cocoa Powder
Enhancing the cake’s appearance and flavor with garnishes adds visual appeal and additional taste layers.
- Fresh Orange Slices:
- Presentation: Arrange thinly sliced oranges around the cake plate or atop the cake for a vibrant, citrusy touch.
- Flavor Boost: Fresh orange slices add a burst of freshness and complement the cake’s citrus notes.
- Whipped Cream:
- Light and Airy: Add a dollop of freshly whipped cream for a light, creamy contrast to the dense cake.
- Flavor Variations: Infuse the whipped cream with a hint of orange zest or a splash of vanilla extract for added flavor.
- Dusting of Cocoa Powder:
- Elegant Finish: Use a fine sieve to lightly dust the top of the cake with unsweetened cocoa powder for a sophisticated look.
- Flavor Enhancement: A cocoa dusting intensifies the chocolate flavor and adds visual contrast.
- Additional Garnishes:
- Chocolate Shavings: Create delicate chocolate curls using a vegetable peeler and sprinkle them over the cake.
- Edible Flowers: Add a touch of elegance with edible flowers that complement the cake’s colors.
- Almond Slivers: Scatter toasted almond slivers for added crunch and visual appeal.
4. Presentation Tips
Layering Cakes: How to Create a Layered Dessert with Multiple Cake Layers
Creating a layered cake not only enhances the visual appeal but also allows for additional fillings and flavor combinations.
- Preparing Multiple Layers:
- Even Layers: Ensure each cake layer is baked to the same size and thickness for a uniform stack.
- Leveling Layers: Use a serrated knife to level any domed tops before stacking to create a flat surface.
- Choosing Fillings:
- Chocolate Ganache: Spread a generous layer of chocolate ganache between each cake layer for added richness.
- Orange Curd: Introduce a tangy orange curd layer to complement the citrus notes.
- Whipped Cream or Buttercream: Use whipped cream or flavored buttercream as a lighter filling option.
- Assembling the Layers:
- Stability: Place the first layer on a sturdy cake board or serving platter. Apply fillings evenly before adding subsequent layers.
- Frosting Between Layers: Ensure the frosting or filling is spread evenly to prevent sliding or uneven stacking.
- Final Frosting: Once all layers are stacked, apply a smooth layer of ganache or glaze over the entire cake for a polished finish.
Individual Servings: Making Mini Cakes or Cupcakes for Easier Serving and Portion Control
Transforming your Chocolate Orange Almond Cake into individual servings makes it easier to serve and offers a charming presentation.
- Mini Cakes:
- Pan Selection: Use mini cake pans or cupcake tins to create smaller, individual-sized cakes.
- Baking Time: Adjust baking times accordingly, typically reducing by about 10-15 minutes depending on the size.
- Frosting: Top each mini cake with a small dollop of ganache or a sprinkle of cocoa powder for a personalized touch.
- Cupcakes:
- Filling Cupcake Liners: Line a cupcake pan with colorful or themed liners to add visual appeal.
- Frosting Options: Use piping bags to add decorative frosting swirls, ganache drizzles, or candied orange slices on top.
- Presentation: Arrange cupcakes on a tiered stand or decorative platter for an elegant display at parties or gatherings.
- Benefits of Individual Servings:
- Portion Control: Easier to manage servings, especially at events or gatherings.
- Customizable: Allows for creative variations and personalizations on each serving.
- Convenient Serving: Simplifies the serving process and minimizes the need for slicing.
Conclusion
Baking a Prolific Oven Chocolate Orange Almond Cake is an exquisite way to showcase the harmonious blend of rich chocolate, zesty orange, and nutty almonds. This decadent delight not only impresses with its deep flavors and moist texture but also offers versatility through various dietary modifications and flavor enhancements.
Recap of the Recipe
prolific oven chocolate orange almond cake recipe
In this guide, we’ve walked you through every step of creating this sumptuous cake, from selecting high-quality ingredients and mastering the baking process to customizing the cake with unique variations and creative serving ideas. Key highlights include:
- Essential Ingredients: High-quality dark chocolate, fresh oranges, and almond flour form the foundation of this cake’s rich and vibrant flavor.
- Baking Techniques: Precise measurements, careful mixing, and proper baking ensure a moist and tender crumb.
- Flavor Enhancements: Adding nuts, infusing spices, and experimenting with different frostings elevate the cake to gourmet levels.
- Presentation Tips: Layered cakes and individual servings offer both elegance and practicality for any occasion.
Encouragement to Try
We encourage you to embrace the art of baking by trying out this Chocolate Orange Almond Cake recipe. Whether you’re baking for a special celebration, a cozy family gathering, or simply to indulge your sweet tooth, this cake is sure to delight. Don’t be afraid to experiment with the suggested variations and serving ideas to make it uniquely yours. Share your baking adventures and enjoy the rich, decadent flavors that this cake brings to your table.
Call to Action
If you enjoyed this recipe and found the tips helpful, we’d love to hear from you! Share your results by leaving a comment below, posting your photos on social media with our hashtag, or reaching out directly. Subscribe to our blog to stay updated with more delicious and easy-to-follow dessert recipes, baking tips, and culinary inspirations. Join our community of passionate bakers and continue your journey towards creating mouthwatering desserts that impress and satisfy. Happy baking!
By following this comprehensive guide, you’re well-equipped to create a Prolific Oven Chocolate Orange Almond Cake that not only tastes divine but also stands out as a centerpiece in your dessert repertoire. Enjoy the process, savor the results, and share the joy of baking with others!