
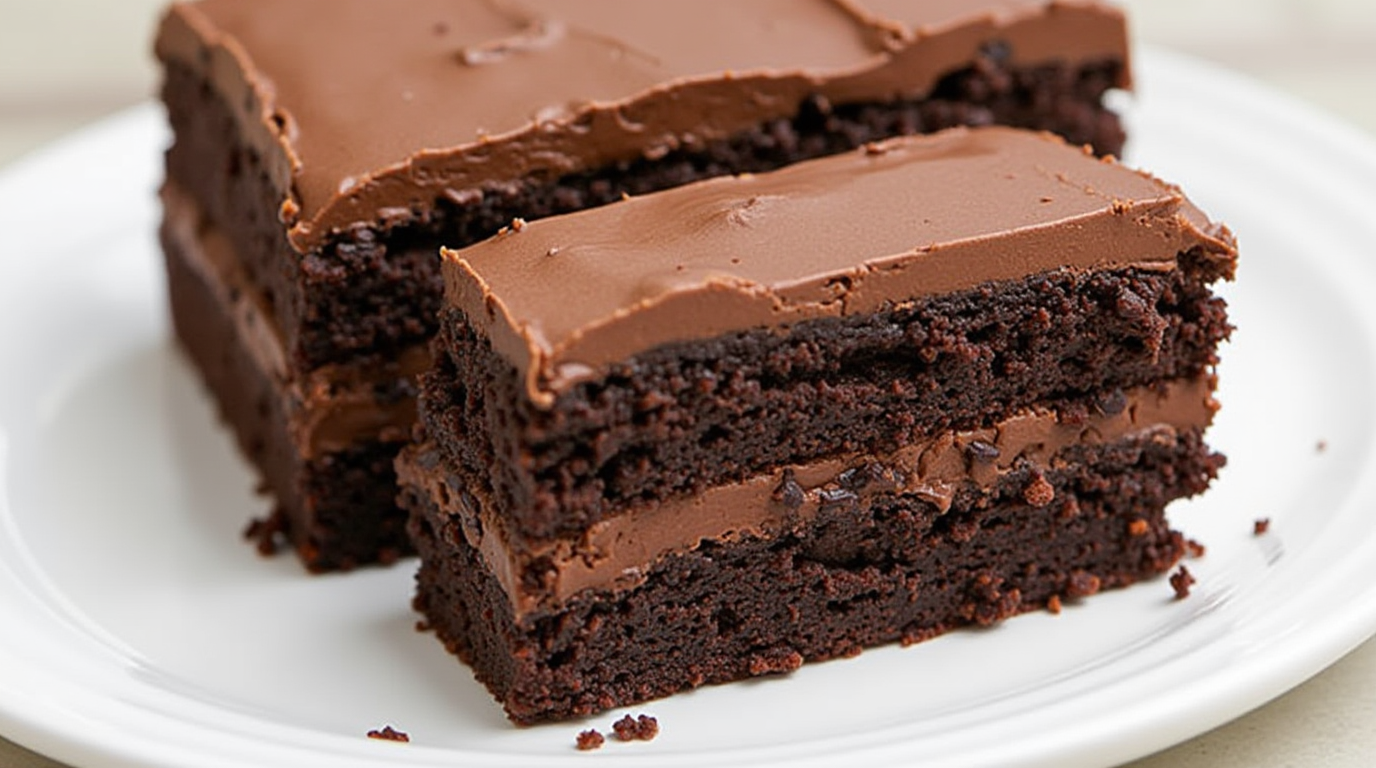
“The Ultimate Guide to Making Triple Chocolate Fudge Cake at Home”
Table of Contents
Creating the perfect chocolate fudge cake recipe often feels like an elusive goal, with many home bakers struggling to achieve that coveted dense, moist texture that defines a true fudge cake. Despite following recipes precisely, the results can range from disappointingly dry to frustratingly crumbly.
However, achieving bakery-worthy results isn’t about luck or secret ingredients. In fact, crafting a Triple Chocolate Fudge Cake comes down to understanding the precise science behind moisture content, fat ratios, and proper mixing techniques. With this guide, you’ll discover the tested methods professional bakers use to create that perfect fudgy texture every time.
We’ll explore everything from ingredient selection to temperature control, ensuring you master the essential elements that transform an ordinary chocolate cake into an irresistibly fudgy masterpiece. Whether you’re a beginner or experienced baker, these proven techniques will help you achieve consistent, impressive results.
The Science Behind Fudgy Texture:” Triple Chocolate Fudge Cake”
The perfect chocolate fudge cake relies on a delicate balance of three crucial elements: moisture, fats, and sugar. Understanding these components helps create that signature dense, rich texture that makes fudge cakes irresistible.
Role of moisture content
Achieving the ideal moisture level stands as a fundamental challenge in crafting a chocolate fudge cake. Too little moisture results in dryness, while excessive moisture produces an unappealingly heavy, soggy texture 1. The key lies in carefully balancing wet ingredients like eggs, butter, and milk. Additionally, the type of cocoa powder significantly influences moisture retention – supermarket cocoa powders vary in fat content from 10% to 24% 2. Cocoa powders with lower fat content naturally contain more starch, which can absorb excessive moisture and lead to a dry cake 2.
Impact of fat ratio
Fats play a vital role in creating the characteristic fudgy texture. They coat flour’s protein molecules, preventing strong gluten networks from forming, ultimately resulting in a tender, crumbly consistency 1. Different types of fats contribute unique properties to the cake’s structure. For instance, liquid oils create an exceptionally soft texture, often perceived as increased moistness 3. Furthermore, using mayonnaise – essentially a blend of eggs, oil, and vinegar – adds substantial protein and fat content, enhancing the cake’s richness 4.
Sugar’s effect on texture
Sugar does more than just sweeten the cake – it fundamentally shapes the texture through multiple mechanisms. As a hygroscopic ingredient, sugar attracts and retains moisture, keeping the cake soft and preventing it from drying out 1. The ratio between sugar and flour significantly impacts the final texture. A precise balance of sugar helps create the perfect fudgy consistency, as too little sugar leads to dryness, while excessive amounts can cause the cake to collapse 1.
Dark brown sugar, specifically, contributes additional moisture due to its higher molasses content 4. Moreover, sugar weakens structural agents in the batter by slowing protein-protein interactions, including gluten formation and egg protein solidification 3. This interference with gluten development results in a softer, more tender crumb structure 5.
The interaction between these three elements creates distinct textural characteristics. For instance, when baked at 170°C, the moisture content typically ranges between 25% and 28% 3. This precise moisture level, combined with the right proportion of fats and sugar, produces that coveted fudgy texture that distinguishes an exceptional chocolate fudge cake from an ordinary chocolate cake.
Essential Ingredients and Their Purpose
The foundation of a superior chocolate fudge cake lies in selecting premium ingredients that work together harmoniously. Understanding the role of each component ensures your cake achieves that coveted fudgy texture every baker desires.
Choosing the right cocoa powder
The quality and type of cocoa powder dramatically influence your cake’s taste and texture. High-fat cocoa powder, containing at least 22% cocoa butter, stands as the cornerstone of exceptional chocolate fudge cakes 6. This elevated fat content produces remarkably moist, tender cakes with an intensified chocolate flavor 6.
Dutch-processed cocoa offers a smoother, milder taste profile with earthy undertones 6. Brands like Guittard Cocoa Rouge Dutch-Processed Cocoa Powder consistently deliver outstanding results, particularly in creating dense, fudgy textures 7. Alternatively, natural cocoa powder provides a sharper, almost citrus-like flavor profile that pairs exceptionally well with baking soda-based recipes 6.
For those seeking premium options, Valrhona Pure Cocoa Powder offers remarkable complexity with subtle dark cocoa notes 6. Meanwhile, Ghirardelli Unsweetened Cocoa Powder produces deeper, darker-colored cakes without overwhelming bitterness 6.
A crucial factor often overlooked is the fat content listed on nutrition labels. Look for cocoa powders containing at least 1 gram of fat per tablespoon serving 6. This higher fat percentage ensures:
- Enhanced moisture retention
- Improved texture development
- Richer chocolate flavor
- Smoother mouthfeel
Best fats for fudgy texture
The choice of fats profoundly affects your cake’s final texture. Vegetable oil, rather than melted butter, creates an exceptionally moist and tender crumb 8. This preference stems from oil remaining liquid at room temperature, coating the tongue and creating a heightened sensation of moisture 9.
Sour cream serves as another essential fat component, contributing both richness and structural balance 8. Its acidity activates the baking soda, promoting proper rise during baking 8. Greek yogurt can substitute for sour cream, although it might introduce subtle tangy notes to the final product 8.
Hot coffee or boiling water plays a vital role alongside fats, “blooming” the cocoa powder to intensify its chocolate flavor 8. Coffee particularly enhances chocolate’s depth without introducing its own distinct taste 8. Nevertheless, boiling water can effectively substitute for those preferring to avoid coffee 8.
The combination of different fats requires precise balance. Using half the typical amount of oil found in standard chocolate cakes, alongside reduced flour quantities, maintains maximum chocolate richness 3. This approach creates an optimal environment for cocoa powder to shine through, delivering intense chocolate flavor without compromising texture 3.
For storage considerations, keep cocoa powder in an airtight container placed in a cool, dry location 6. Properly stored, cocoa powder maintains its quality for approximately three years 6. Although expired cocoa powder remains safe to use, its flavor potency gradually diminishes over time 6.
Mixing Method for Perfect Results
Mastering the mixing technique stands as a crucial step in achieving that perfect chocolate fudge cake texture. Even with premium ingredients, improper mixing can lead to disappointing results. Let’s explore the precise methods that ensure consistent success.
Temperature of ingredients
Room temperature ingredients play a vital role in creating the ideal cake texture. At 70°F, ingredients achieve optimal emulsification, resulting in the finest texture 2. Conversely, cold ingredients at 40°F lead to slower emulsification and coarser texture, whereas warm ingredients around 80°F produce slightly coarser results 2.
To prepare ingredients properly:
- Set them out 1-2 hours before mixing
- Aim for moderate room temperature (70°F)
- Quickly warm eggs by placing them in warm water 10
Proper mixing sequence
The mixing process begins with combining wet and dry ingredients separately. Initially, the batter appears thick, similar to brownie consistency 8. Upon adding hot water or coffee, the mixture thins out considerably 3.
For optimal results, follow this sequence:
- Cream butter and sugar until pale and fluffy (approximately 5 minutes) 11
- Incorporate eggs thoroughly
- Alternate between adding dry ingredients and liquids
- Bloom cocoa powder with hot liquid before incorporating
Notably, hot water or coffee serves a dual purpose – it “blooms” the cocoa powder, intensifying the chocolate flavor 4. This step proves crucial for developing the signature fudgy texture.
Signs of over-mixing
Recognizing the signs of over-mixing helps prevent common texture issues. Surprisingly, contrary to popular belief, extended mixing actually weakens protein networks rather than toughening the cake 12.
Key indicators of over-mixing include:
- Batter becomes dense and heavy
- Texture appears overly uniform
- Mix feels greasy and warm
- Consistency becomes runny or slack 13
The ideal mixing duration typically ranges between 2-6 minutes 12. Beyond this point, the cake structure weakens significantly, potentially becoming so fragile it breaks when removed from the pan 12.
Proper mixing technique involves using gentle motions, particularly when incorporating the bloomed cocoa mixture 14. This approach minimizes air bubbles, ensuring a silky-smooth texture. Furthermore, if using an electric mixer, maintain a moderate speed to prevent excessive aeration 11.
Remember that the initial watery consistency of the batter shouldn’t cause concern – this characteristic contributes to the desired fudgy outcome 3. Throughout the mixing process, focus on achieving a uniform blend without overworking the ingredients.
Baking Time and Temperature Control
Precise temperature control and timing make the difference between a sublime chocolate fudge cake and a disappointing result. Understanding the visual and physical indicators of doneness ensures consistent success with every bake.
Optimal oven temperature
Setting your oven to 350°F (175°C) creates the ideal environment for chocolate fudge cake 15. Still, relying solely on the dial setting proves insufficient since most home ovens run slightly hotter or cooler than indicated. Therefore, using an oven thermometer becomes crucial for achieving accurate temperature control 16.
The proper temperature accomplishes several critical functions:
- Activates leavening agents uniformly
- Develops proper structure
- Ensures even moisture distribution
- Creates optimal texture development
Preheating remains essential – allow at least 15 minutes for your oven to reach the target temperature. Subsequently, place the cake in the center rack where heat distribution proves most consistent 3.
Visual doneness cues
Determining when your chocolate fudge cake reaches perfection requires attention to multiple indicators. First, observe the cake’s edges – they should pull away slightly from the pan, creating a small gap of approximately 1/8 to 1/4 inch 5. This separation signals that the outer portion has finished baking.
Beyond visual cues, your nose serves as a reliable guide. A properly baked cake fills the kitchen with an enticing aroma of butter and sugar 5. Nonetheless, since chocolate cakes appear dark, traditional golden-brown color indicators prove less reliable 17.
For precise testing, employ these methods in sequence:
- The Toothpick Test: Insert a toothpick into the center – it should emerge with just a few moist crumbs 3. Clean toothpicks indicate potential overbaking, whereas wet batter signals underbaking.
- The Spring Test: Gently press the cake’s center with your fingertips. A properly baked cake springs back immediately 18. If an indentation remains, continue baking.
- Edge Assessment: Look for matte, dry edges rather than shiny surfaces 17. For chocolate cakes specifically, focus on texture changes rather than color.
Timing varies based on pan size and shape:
- 8-inch round pans: 35-40 minutes 1
- 9×13 inch pans: 35 minutes 15
- Square pans: approximately 40 minutes 17
Remember that these times serve as guidelines rather than strict rules. Environmental factors, oven peculiarities, and ingredient temperatures can affect baking duration 16.
A properly baked chocolate fudge cake exhibits specific characteristics:
- Tender, moist interior
- Perfect crumb structure
- Slight resistance when touched
- Clean separation from pan edges
Avoid common timing mistakes by checking the cake 5-10 minutes before the suggested baking time 17. This practice prevents overbaking, which results in dry, tough texture. Underbaking, equally problematic, produces gummy, dense results 5.
For storage and serving, allow the cake to cool in the pan for 10 minutes 19. Subsequently, transfer to a wire rack for complete cooling. When properly stored, the cake maintains freshness for up to a week 1. For optimal taste and texture, let it stand at room temperature for 30 minutes before serving 1.
Common Problems and Solutions
Even experienced bakers encounter challenges when crafting their chocolate fudge cake. Understanding common issues and their solutions ensures consistent success in achieving that perfect fudgy texture.
Dry cake fixes
A dry chocolate fudge cake often results from measuring ingredients incorrectly or overbaking. First, check your flour measurement – using a scale proves more accurate than cup measurements 20. For already baked cakes, several effective remedies exist:
Simple syrup glaze stands as the most reliable fix. Create it by boiling equal parts water and sugar until dissolved 21. Alternatively, milk soaking offers another effective solution – this method excels at restoring moisture to dry cakes 20.
For cakes showing minimal dryness, consider these approaches:
- Fill with moisture-rich ingredients
- Apply thick layers of creamy frosting
- Transform into cake pops by mixing with frosting 22
Sinking center solutions
A sunken center typically stems from several key factors. Most commonly, opening the oven door too early disrupts the baking process – the sudden temperature change causes partially baked layers to collapse 6.
To prevent sinking centers:
- Use correct pan sizes – an 8-inch pan holds 25% less volume than a 9-inch pan 6
- Maintain proper oven temperature with a thermometer 7
- Avoid slamming oven doors during baking 23
- Check leavening agent freshness – 80% of bakers unknowingly use expired products 7
When rotating pans becomes necessary, handle the oven door gently. Sudden movements can cause partially baked cakes to sink, especially if the center remains liquid 6. Furthermore, ensure your oven maintains consistent temperature – fluctuations as small as 25 degrees can affect the final result 7.
Crumbly texture remedies
Crumbly textures often indicate improper ingredient ratios or mixing issues. Too much flour commonly causes excessive crumbling 24. Correspondingly, insufficient fat or liquid can lead to structural weakness 22.
For optimal texture control:
- Measure flour precisely – one cup weighs approximately 4.25 ounces 7
- Ensure ingredients reach room temperature (70°F) before mixing 7
- Stop mixing once ingredients combine – overmixing weakens gluten structure 7
Should your cake turn out crumbly, consider these rescue techniques:
- Transform it into a trifle with whipped cream and fruits
- Create cake pops by combining with frosting
- Layer with rich buttercream to add moisture and stability 22
Proper cooling also impacts texture significantly. Allow the cake to rest in its pan for 10 minutes before transferring to a wire rack 7. This step prevents structural collapse and maintains optimal moisture distribution throughout the cake.
Conclusion
Mastering the perfect chocolate fudge cake requires attention to several critical elements. Understanding the delicate balance between moisture, fats, and sugar creates that signature dense, rich texture home bakers desire. Premium ingredients, particularly high-fat cocoa powder and carefully selected fats, serve as the foundation for exceptional results.
Temperature control stands as another crucial factor throughout the process. Room-temperature ingredients, precise mixing techniques, and accurate oven settings work together to produce that coveted fudgy consistency. Though challenges might arise, solutions exist for common issues like dry texture or sinking centers.
Armed with these baker-tested methods and scientific principles, anyone can create bakery-worthy chocolate fudge cakes. Remember that practice builds confidence – each attempt brings valuable experience and deeper understanding of the baking process. Start with quality ingredients, follow the proper techniques, and soon you’ll achieve that perfect chocolate fudge cake that friends and family will request time after time.