
The Ultimate Baker’s German Chocolate Cake Recipe: A Step-by-Step Guide
Table of Contents
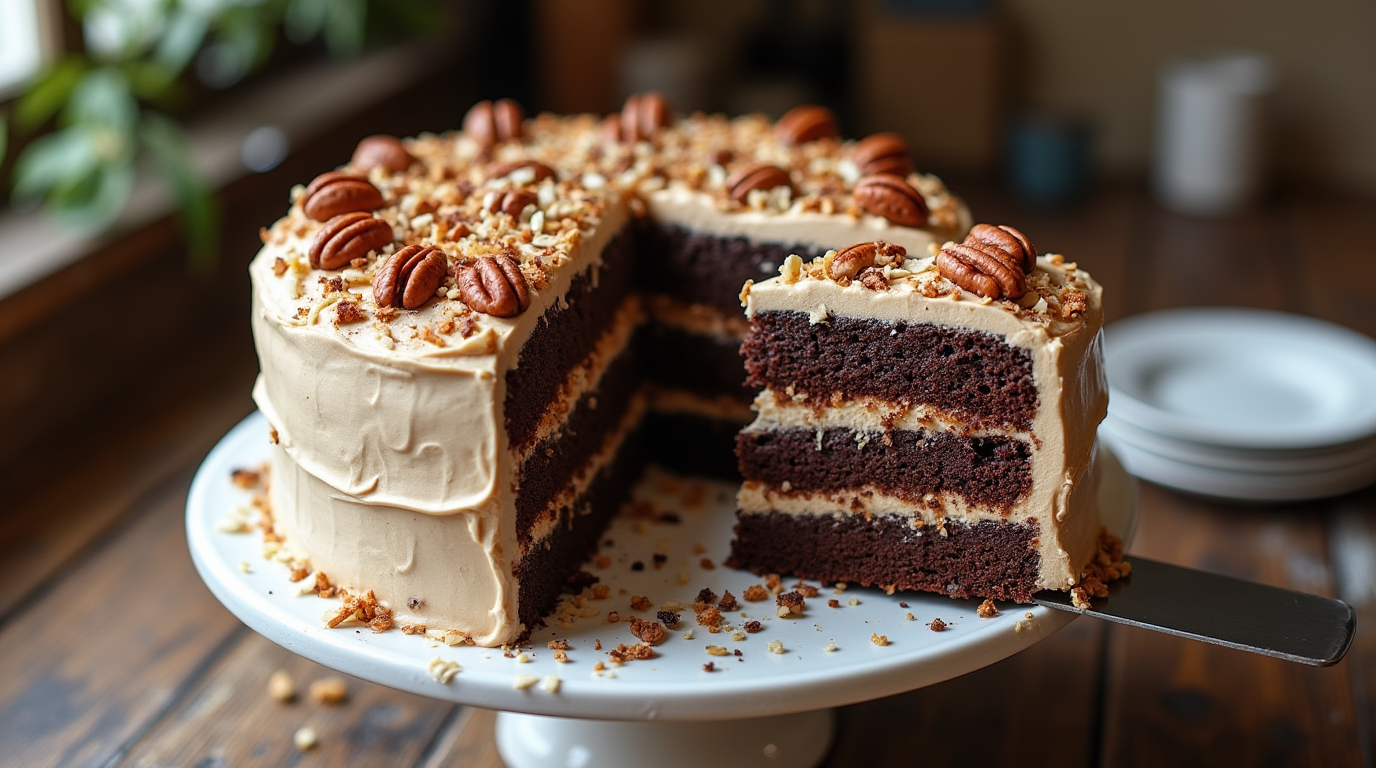
Imagine sinking your fork into a slice of German Chocolate Cake, where each bite unveils a harmonious blend of rich, velvety chocolate layers paired with a luscious coconut pecan frosting. This timeless dessert has captivated sweet tooths for generations, celebrated for its decadent flavors and irresistible texture. Whether it’s a family gathering, a festive holiday, or a special celebration, German Chocolate Cake stands out as a favorite choice that never fails to impress.
In this post, our goal is to provide you with the ultimate, foolproof recipe for creating a moist and delicious German Chocolate Cake that rivals any bakery masterpiece. Whether you’re an experienced baker or just starting out, this comprehensive guide will walk you through every step to ensure your cake turns out perfectly every time.
You’ll discover all the essential ingredients needed to achieve that classic flavor, detailed step-by-step instructions to simplify the baking process, and expert tips and tricks to enhance your baking skills. Additionally, we’ll explore variations and customizations that allow you to personalize your cake, making it uniquely yours. Get ready to elevate your baking game and delight your loved ones with this exquisite German Chocolate Cake recipe!
Ingredients and Tools Needed
Primary Ingredients
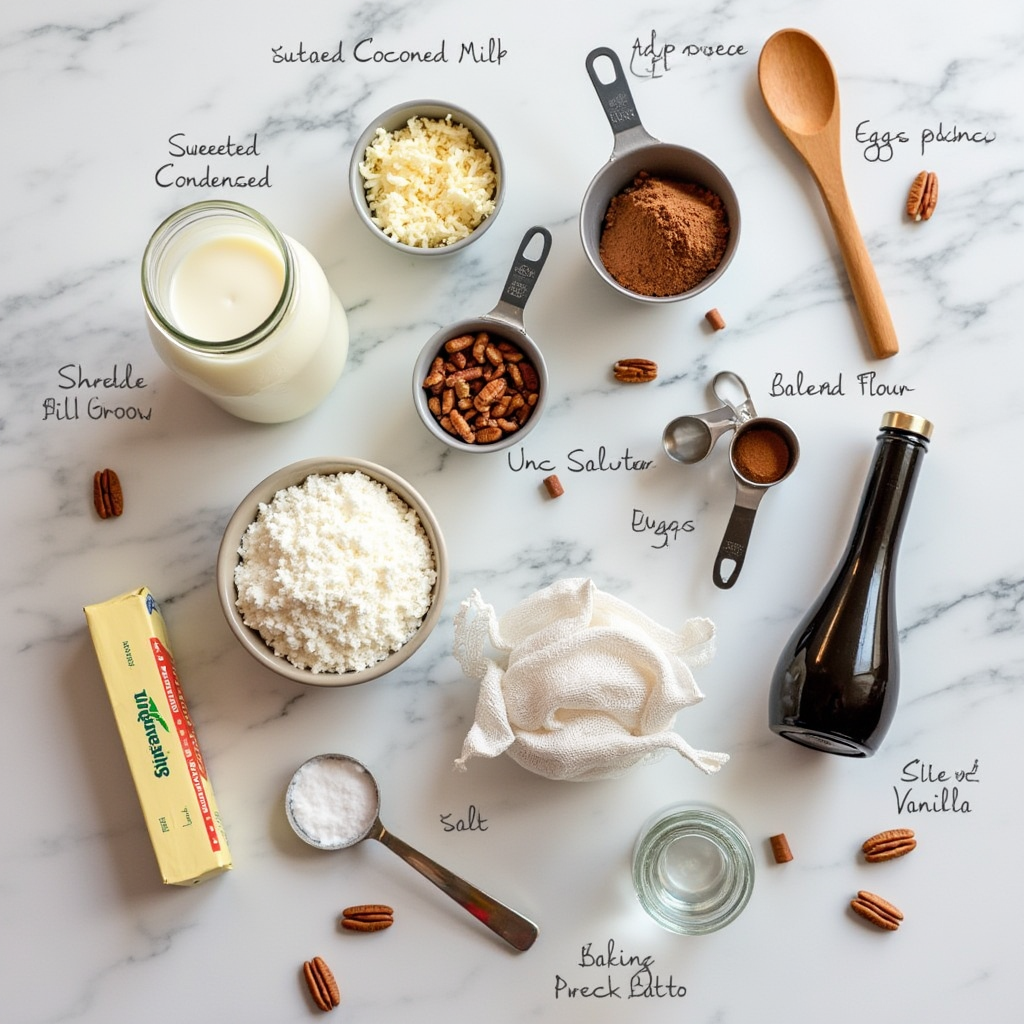
Creating the ultimate Baker’s German Chocolate Cake starts with selecting the right primary ingredients. Each component plays a crucial role in achieving the cake’s signature moistness, rich chocolate flavor, and delectable coconut pecan frosting. Below is a detailed overview of the essential ingredients you’ll need, along with their specific roles and tips for selecting the best quality products.
| Ingredient | Role in the Recipe | Selection Tips |
|---|---|---|
| Sweetened Condensed Milk | Provides sweetness and moisture to the coconut pecan frosting. | Choose a high-quality brand like Kraft for consistent sweetness and texture. |
| Shredded Coconut | Adds texture and flavor to the frosting, giving it a chewy contrast to the soft cake layers. | Opt for unsweetened, sweetened, or toasted shredded coconut based on your flavor preference. |
| Pecans | Offers a crunchy texture and nutty flavor, enhancing the overall taste and mouthfeel. | Select fresh, high-quality pecans. Lightly toast them to deepen their flavor before adding to the frosting. |
| All-Purpose Flour | Forms the structure of the cake, ensuring it rises properly and holds together. | Use King Arthur or another reputable brand to ensure consistent results. Sift the flour to remove any lumps. |
| Cocoa Powder | Provides the deep chocolate flavor that defines the cake’s richness. | Choose Dutch-processed cocoa powder for a smoother flavor and darker color. Avoid using natural or unsweetened types. |
Sweetened Condensed Milk
Sweetened Condensed Milk is a pivotal ingredient in the traditional German Chocolate Cake frosting. It not only imparts a rich sweetness but also contributes to the creamy texture that makes the frosting so indulgent. When selecting sweetened condensed milk, Kraft is a reliable brand known for its consistent quality and sweetness level. Ensure the can is intact and store it in a cool, dry place until ready to use.
Pro Tip: For an extra layer of flavor, gently heat the sweetened condensed milk before mixing it into the frosting. This helps it blend more smoothly with other ingredients.
Shredded Coconut
Shredded Coconut adds both texture and a subtle tropical flavor to the frosting, creating a delightful contrast to the smooth cake layers. Depending on your preference, you can choose between unsweetened or sweetened shredded coconut. Sweetened shredded coconut will add additional sweetness, while unsweetened provides a more natural coconut flavor.
Pro Tip: Toasting the shredded coconut lightly before adding it to the frosting can enhance its flavor, giving it a nutty aroma that complements the chocolate perfectly.
Pecans
Pecans are essential for achieving the classic texture and flavor profile of German Chocolate Cake. They introduce a satisfying crunch and a rich, buttery taste that pairs wonderfully with the sweet frosting. Fresh pecans are preferable as they offer the best flavor and texture.
Pro Tip: To elevate the pecans’ flavor, consider toasting them lightly in a dry skillet over medium heat for about 5 minutes. This process enhances their natural oils and deepens their flavor, making them even more delicious in the frosting.
All-Purpose Flour
All-Purpose Flour is the foundation of the cake batter, providing the necessary structure and ensuring the cake rises properly. Using a high-quality flour, such as King Arthur, guarantees consistency and reliability in your baking results. Sifting the flour before measuring helps eliminate any lumps, ensuring a smooth and even batter.
Pro Tip: For an extra tender crumb, avoid overmixing the batter once the flour is added. Overmixing can develop the gluten in the flour, leading to a denser cake texture.
Cocoa Powder
Cocoa Powder is what gives the German Chocolate Cake its deep, rich chocolate flavor. Opting for Dutch-processed cocoa powder offers a smoother, more mellow chocolate taste and a darker color compared to natural cocoa powder. This type of cocoa interacts better with the baking soda in the recipe, contributing to the cake’s perfect rise and texture.
Pro Tip: For an intensified chocolate flavor, consider using a high-quality Dutch-processed cocoa powder. Brands like Valrhona or Ghirardelli are excellent choices that provide a robust chocolate taste.
Why These Ingredients Matter
Each primary ingredient in the German Chocolate Cake recipe serves a specific purpose that contributes to the cake’s overall success:
- Sweetened Condensed Milk and Butter create a creamy, smooth frosting that is both sweet and rich.
- Shredded Coconut and Pecans introduce unique textures, balancing the cake’s softness with delightful crunchiness.
- All-Purpose Flour ensures the cake maintains its structure, providing a tender crumb without being too dense.
- Cocoa Powder delivers the intense chocolate flavor that makes the cake so irresistible.
By carefully selecting high-quality versions of these ingredients and following the tips provided, you’ll be well on your way to baking the ultimate, moist, and delicious German Chocolate Cake that your family and friends will love.
Ingredient Substitutions and Variations
While the primary ingredients listed are essential for the classic German Chocolate Cake, there are several substitutions and variations you can explore to customize the recipe to your liking or dietary needs:
- Sweetened Condensed Milk: For a dairy-free option, you can substitute with coconut condensed milk or a homemade version using coconut cream and sugar.
- Shredded Coconut: If you have nut allergies or prefer a different flavor, consider using toasted almonds or sunflower seeds as an alternative.
- Pecans: Walnuts or hazelnuts can be used in place of pecans if you prefer or if they are more readily available.
- All-Purpose Flour: For a gluten-free version, substitute with a gluten-free all-purpose flour blend that maintains the structure and texture of the cake.
- Cocoa Powder: If you prefer a sweeter chocolate flavor, you can use a combination of cocoa powder and melted dark chocolate to intensify the taste.
Experimenting with these substitutions can help you tailor the German Chocolate Cake to better suit your taste preferences or dietary requirements without compromising on flavor or texture.
Additional Ingredients
In addition to the primary ingredients, several additional ingredients play vital roles in the Ultimate Baker’s German Chocolate Cake recipe. These components contribute to the cake’s structure, flavor balance, and overall texture. Understanding each ingredient’s purpose and selecting high-quality options will ensure your cake achieves the perfect consistency and taste.
| Ingredient | Role in the Recipe | Selection Tips |
|---|---|---|
| Eggs | Provide structure, moisture, and richness to the cake batter. | Use large, fresh eggs for consistent results. Room temperature eggs blend more easily into the batter. |
| Butter | Adds moisture and richness; contributes to the cake’s tender crumb and flavor. | Choose unsalted, high-quality butter like European-style for superior flavor and texture. |
| Baking Powder | Acts as a leavening agent, helping the cake rise and achieve a light, airy texture. | Use double-acting baking powder for reliable and consistent rising. Check the expiration date for potency. |
| Salt | Enhances the overall flavor and balances the sweetness of the cake and frosting. | Opt for fine sea salt for even distribution and better dissolution in the batter. |
| Vanilla Extract | Adds depth and complexity to the cake’s flavor profile, complementing the chocolate. | Use pure vanilla extract instead of imitation for a richer, more authentic flavor. Avoid overly sweetened versions. |
Eggs
Eggs are essential for creating the structure and stability of your German Chocolate Cake. They act as a binding agent, holding the ingredients together while also contributing to the cake’s moisture and richness. Each egg adds volume and helps achieve a tender crumb.
- Selection Tips:
- Size: Use large eggs for consistent measurements and optimal results.
- Temperature: Ensure eggs are at room temperature before incorporating them into the batter. Room temperature eggs blend more smoothly, leading to a more uniform batter and even cake texture.
- Freshness: Fresh eggs provide better structure and stability, enhancing the cake’s overall rise and texture.
- Pro Tip: To prevent overmixing the batter, which can lead to a dense cake, add the eggs one at a time, ensuring each is fully incorporated before adding the next.
Butter
Butter is a key ingredient that imparts moisture, richness, and a delicate flavor to the cake. It contributes to the cake’s tender crumb and helps achieve a smooth, velvety texture. The fat in butter also aids in creating a fine crumb structure, preventing the cake from becoming too dense.
- Selection Tips:
- Type: Use unsalted butter to better control the amount of salt in your recipe. High-quality, European-style butter has a higher fat content and richer flavor, enhancing the cake’s taste and texture.
- Temperature: Ensure butter is at room temperature before creaming. Softened butter blends more easily with sugar, creating a light and airy batter essential for a well-risen cake.
- Pro Tip: For an extra layer of flavor, consider using browned butter. Gently heating the butter until it turns golden brown and develops a nutty aroma can add depth to your cake.
Baking Powder
Baking Powder serves as a leavening agent, enabling the cake to rise and achieve a light, airy texture. It reacts with the wet ingredients to produce carbon dioxide gas, which creates bubbles in the batter, causing the cake to expand and become fluffy.
- Selection Tips:
- Type: Use double-acting baking powder, which releases gas bubbles both when mixed with wet ingredients and when exposed to heat in the oven. This ensures a reliable rise and consistent texture.
- Freshness: Check the expiration date on your baking powder. Fresh baking powder is crucial for proper leavening. To test its potency, add a teaspoon to a small amount of warm water—if it bubbles vigorously, it’s still effective.
- Pro Tip: Measure baking powder accurately using the spoon and level method to avoid adding too much, which can cause the cake to rise rapidly and then collapse, resulting in a dense texture.
Salt
Salt plays a subtle yet crucial role in enhancing the overall flavor of the cake. It balances the sweetness of the ingredients, bringing out the rich chocolate flavors and preventing the cake from tasting overly sweet. Additionally, salt strengthens the gluten structure, contributing to the cake’s texture.
- Selection Tips:
- Type: Use fine sea salt for even distribution throughout the batter. Fine salt dissolves more readily, ensuring a consistent flavor without gritty pockets.
- Quality: Choose a high-quality salt to avoid any bitter or metallic aftertastes that can occur with lower-quality options.
- Pro Tip: When creaming butter and sugar, adding a pinch of salt helps to enhance the flavors and improve the overall taste profile of the cake.
Vanilla Extract
Vanilla Extract adds depth and complexity to the cake’s flavor profile, complementing the rich chocolate notes and enhancing the overall taste. It brings a subtle sweetness and aromatic quality that elevates the dessert, making it more enticing and well-rounded.
- Selection Tips:
- Type: Opt for pure vanilla extract rather than imitation versions. Pure extract offers a richer, more authentic flavor that cannot be replicated by synthetic alternatives.
- Quality: Choose high-quality extract for the best flavor. Look for brands that use real vanilla beans and minimal additives.
- Pro Tip: For an intensified vanilla flavor, consider adding both pure vanilla extract and a small amount of vanilla bean paste. This combination provides a more robust and fragrant vanilla presence in the cake.
Why These Additional Ingredients Matter
Each additional ingredient contributes uniquely to the German Chocolate Cake, ensuring it achieves the perfect balance of structure, flavor, and texture:
- Eggs provide the necessary structure and moisture, creating a stable and tender crumb.
- Butter enhances richness and contributes to a moist, delicate texture.
- Baking Powder ensures the cake rises properly, resulting in a light and airy dessert.
- Salt balances sweetness and amplifies the chocolate flavors, preventing the cake from tasting cloyingly sweet.
- Vanilla Extract adds depth and complexity, making the chocolate flavor more pronounced and the overall taste more sophisticated.
By carefully selecting and incorporating these additional ingredients, you ensure that your German Chocolate Cake is not only flavorful but also has the ideal texture and structure that makes it a beloved classic.
Ingredient Substitutions and Variations:
While the additional ingredients listed are essential for the classic German Chocolate Cake, there are several substitutions and variations you can explore to customize the recipe to your liking or dietary needs:
- Eggs:
- Vegan Option: Replace each egg with a flax egg (1 tablespoon ground flaxseed mixed with 3 tablespoons water, let sit for 5 minutes) or use commercial egg replacers.
- Allergy-Friendly: Use egg substitutes like applesauce or mashed bananas, though these may slightly alter the texture.
- Butter:
- Dairy-Free: Substitute with coconut oil, margarine, or vegan butter alternatives to achieve a similar richness and texture.
- Flavor Variation: Experiment with browned butter for a nutty, caramel-like flavor that adds depth to the cake.
- Baking Powder:
- Homemade Substitute: Combine 1 part baking soda with 2 parts cream of tartar if you run out of baking powder.
- Low Sodium: Use low-sodium baking powder if you’re mindful of salt intake, adjusting additional salt in the recipe accordingly.
- Salt:
- Salt-Free: For a salt-free version, omit the salt and consider adding a pinch of sugar to maintain flavor balance.
- Alternative Salts: Use sea salt flakes for a different texture and flavor profile, but reduce the overall quantity to prevent over-salting.
- Vanilla Extract:
- Alternative Flavors: Substitute with almond extract for a different aromatic profile or use a combination of vanilla and other extracts like orange or coffee for a unique twist.
- Natural Enhancers: Incorporate vanilla bean paste or scraped vanilla beans for an intensified and visually appealing vanilla presence.
Experimenting with these substitutions allows you to tailor the German Chocolate Cake to better suit your dietary preferences, ingredient availability, or desired flavor profiles without compromising on the cake’s deliciousness.
Kitchen Tools and Equipment :
ultimate Baker’s German Chocolate Cake
Having the right kitchen tools and equipment is essential for baking the Ultimate Baker’s German Chocolate Cake. These tools not only make the baking process smoother and more efficient but also ensure that each component of the cake is prepared correctly for the best results. Below is a detailed overview of the essential baking essentials and preparation tools you’ll need, along with tips on selecting the best quality products to enhance your baking experience.
| Category | Tool | Role in the Recipe | Selection Tips |
|---|---|---|---|
| Baking Essentials | Mixing Bowls | Used for combining ingredients, mixing batter, and preparing frosting. | Opt for stainless steel or glass bowls for durability and ease of cleaning. Ensure they are various sizes for versatility. |
| Electric Mixer | Facilitates creaming butter and sugar, beating eggs, and mixing batter. | Choose a stand mixer for heavy-duty tasks or a hand mixer for smaller batches. Look for models with multiple speed settings and attachments. | |
| Cake Pans | Mold the cake batter into the desired shape and size for baking. | Use non-stick or high-quality metal pans for even baking. Consider having multiple sizes (e.g., 9-inch and 8-inch) to accommodate different layers. | |
| Measuring Cups and Spoons | Ensure accurate measurement of both dry and liquid ingredients. | Invest in stainless steel or plastic sets with clear markings. Use separate sets for dry and liquid measurements for precision. | |
| Preparation Tools | Spatula | Scrape down bowls, fold ingredients, and apply frosting smoothly. | Choose a silicone spatula for flexibility and durability. A variety of sizes can be helpful for different tasks. |
| Cooling Racks | Allow baked cake layers to cool evenly and prevent sogginess. | Select racks that are sturdy and easy to clean. Wire racks are preferable for optimal airflow and cooling efficiency. | |
| Oven | Provides the consistent heat needed to bake the cake layers properly. | Ensure your oven maintains an accurate temperature. Consider using an oven thermometer to verify heat accuracy and even baking. |
Mixing Bowls
Mixing Bowls are the foundation of any baking project, including your German Chocolate Cake. They are used for combining dry and wet ingredients, mixing batter, and preparing the frosting. Having a variety of sizes allows you to handle different quantities and tasks efficiently.
- Selection Tips:
- Material: Stainless steel bowls are durable, non-reactive, and easy to clean. Glass bowls are also a great choice as they allow you to monitor the mixing process without transferring the batter.
- Size Variety: Invest in a set that includes multiple sizes (e.g., 1 quart, 2 quarts, and 4 quarts) to accommodate different stages of the recipe.
- Stability: Ensure the bowls have a stable base to prevent slipping during mixing.
- Pro Tip: Nesting bowls with lids can save space and keep your kitchen organized. Additionally, using a clear glass bowl can help you better gauge the mixing progress and prevent overmixing.
Electric Mixer
An Electric Mixer significantly streamlines the baking process by efficiently creaming butter and sugar, beating eggs, and mixing batter to the perfect consistency. This tool ensures that your ingredients are well combined, resulting in a smooth and even batter.
- Selection Tips:
- Stand Mixer vs. Hand Mixer: A stand mixer is ideal for larger batches and heavier doughs, offering hands-free operation with various attachments. A hand mixer is more portable and suitable for smaller tasks.
- Power and Speed Settings: Look for mixers with multiple speed settings to control the mixing intensity. A more powerful motor can handle dense batters without overheating.
- Attachments: Ensure the mixer comes with essential attachments such as a paddle for creaming and a whisk for whipping.
- Pro Tip: If you opt for a stand mixer, consider investing in additional attachments like a dough hook or whisk to expand its functionality for future baking projects.
Cake Pans
Cake Pans shape your cake batter into the desired form and size, ensuring uniform baking and easy handling. Using the right pans is crucial for achieving even layers and a professional appearance.
- Selection Tips:
- Material: Non-stick pans prevent the cake from sticking, making it easier to remove and reducing the need for excessive greasing. Aluminum pans conduct heat evenly, promoting uniform baking.
- Size and Shape: Standard 9-inch round pans are commonly used for layered cakes. Having multiple sizes (e.g., 8-inch and 9-inch) can help accommodate different layer thicknesses and shapes.
- Quality: Invest in high-quality pans to ensure durability and consistent performance. Look for pans with sturdy handles for easy maneuvering.
- Pro Tip: Line your cake pans with parchment paper or use a silicone baking mat to further prevent sticking and ensure a clean release.
Measuring Cups and Spoons
Accurate measurements are critical in baking to achieve the desired texture and flavor. Measuring Cups and Spoons ensure that each ingredient is added in the correct quantity, maintaining the recipe’s balance.
- Selection Tips:
- Material: Stainless steel sets are durable and resistant to staining, while plastic sets are lightweight and often color-coded for easy identification.
- Precision: Look for sets with clear, easy-to-read markings. Graduated measurements for both dry and liquid ingredients help prevent errors.
- Separate Sets: Use dedicated sets for dry and liquid ingredients to avoid cross-contamination and ensure precision.
- Pro Tip: Level off dry ingredients with a straight edge for the most accurate measurements. For liquid ingredients, place the measuring cup on a flat surface and check the measurement at eye level.
Spatula
A Spatula is a versatile tool used for scraping down mixing bowls, folding ingredients, and applying frosting smoothly onto the cake. Its flexibility and durability make it indispensable in both mixing and decorating.
- Selection Tips:
- Material: Silicone spatulas are heat-resistant, flexible, and gentle on non-stick surfaces. They are also easy to clean and durable.
- Variety: Having a variety of spatulas in different sizes can help with different tasks, from mixing to spreading frosting evenly.
- Comfort: Choose spatulas with comfortable, ergonomic handles to reduce hand fatigue during extended mixing or decorating sessions.
- Pro Tip: Keep a dedicated spatula for mixing and another for frosting to avoid contamination and ensure each task is performed efficiently.
Cooling Racks
Cooling Racks allow your baked cake layers to cool evenly and prevent the bottoms from becoming soggy. Proper cooling is essential for maintaining the cake’s texture and making it easier to handle during assembly.
- Selection Tips:
- Material: Stainless steel racks are sturdy and easy to clean, providing excellent airflow for even cooling.
- Design: Choose racks with a slight slope to facilitate drainage and prevent the cake from sitting in excess moisture.
- Size: Ensure the rack is large enough to accommodate your cake pans and provide ample space for cooling.
- Pro Tip: Preheating the cooling rack slightly can help the cake cool more quickly and evenly, especially in humid environments.
Oven
The Oven is the heart of the baking process, providing the consistent heat necessary to bake the cake layers to perfection. A reliable oven ensures that your cakes rise evenly and achieve the ideal texture and flavor.
- Selection Tips:
- Temperature Accuracy: Use an oven thermometer to verify that your oven maintains the correct temperature, as many ovens can be inaccurate.
- Even Heating: Ensure your oven heats evenly by rotating your cake pans halfway through the baking time to prevent hotspots from causing uneven baking.
- Features: Consider ovens with convection settings for more even heat distribution and faster baking times.
- Pro Tip: Avoid opening the oven door frequently while baking, as this can cause temperature fluctuations that affect the cake’s rise and texture. Use the oven light and window to monitor progress instead.
Why These Kitchen Tools and Equipment Matter
Each kitchen tool and piece of equipment plays a specific role in the baking process, contributing to the success of your German Chocolate Cake:
- Mixing Bowls provide the space needed to combine ingredients thoroughly, ensuring a smooth batter and even distribution of flavors.
- Electric Mixers save time and effort, allowing you to achieve the perfect creaming and mixing consistency essential for a tender cake.
- Cake Pans shape your cake layers uniformly, promoting even baking and professional-looking results.
- Measuring Cups and Spoons ensure precise ingredient quantities, maintaining the recipe’s balance and preventing issues like over or under-flavoring.
- Spatulas facilitate smooth mixing, folding, and frosting application, contributing to the cake’s overall texture and appearance.
- Cooling Racks allow baked layers to cool properly, preventing sogginess and making assembly easier.
- Ovens provide the consistent heat necessary for baking, ensuring that your cake rises correctly and achieves the desired texture and flavor.
By investing in high-quality kitchen tools and equipment, you not only enhance the efficiency and ease of the baking process but also ensure that each step is executed with precision, resulting in a moist, rich, and delicious German Chocolate Cake that stands out as a true masterpiece.
Ingredient Substitutions and Variations for Kitchen Tools
While the listed kitchen tools and equipment are essential for baking the classic German Chocolate Cake, there are alternative options and substitutions you can consider based on your kitchen setup or personal preferences:
- Mixing Bowls:
- Alternative: Use a large, heat-resistant plastic bowl if you don’t have stainless steel or glass options. However, ensure it’s sturdy and won’t warp under the weight of heavy ingredients.
- Electric Mixer:
- Hand Mixer Substitute: If you don’t own an electric mixer, a high-quality hand mixer can be used to achieve similar results, though it may require more effort and time.
- Stand Mixer Substitute: For those without a stand mixer, manually creaming butter and sugar with a whisk and spatula is possible, though less efficient.
- Cake Pans:
- Alternative Shapes: If round pans are unavailable, you can use square or rectangular pans, adjusting the baking time as needed.
- Reusable Silicone Pans: These can be a flexible alternative to metal pans, providing non-stick surfaces and easy release of the baked cake.
- Measuring Cups and Spoons:
- Digital Scale: For more precise measurements, especially with dry ingredients, a digital kitchen scale can be used instead of measuring cups.
- Integrated Measuring Spoons: Some electric mixers come with built-in measuring spoons, offering convenience if you have limited space.
- Spatula:
- Offset Spatula: While not necessary, an offset spatula can provide better control when spreading frosting or lifting cake layers.
- Flexible Silicone Tools: These can offer similar functionality if you prefer different textures or designs.
- Cooling Racks:
- DIY Alternatives: If you don’t have a cooling rack, place the cake pans on a wire cooling rack or a sturdy wire strainer to allow proper airflow.
- Tiered Racks: For larger batches, tiered cooling racks can save space and provide multiple cooling surfaces.
- Oven:
- Convection Oven: If you have a convection oven, use the convection setting for more even baking. If not, regular oven settings will suffice, but be mindful of potential hotspots.
- Portable Ovens: For those with limited kitchen space, a portable countertop oven can be a versatile alternative for baking.
Exploring these substitutions and variations allows you to adapt the baking process to your available tools and preferences without compromising the quality of your German Chocolate Cake
Preparation Tools and Equipment
Having the right kitchen tools and equipment is essential for baking the Ultimate Baker’s German Chocolate Cake. These tools not only make the baking process smoother and more efficient but also ensure that each component of the cake is prepared correctly for the best results. Below is a detailed overview of the essential baking essentials and preparation tools you’ll need, along with tips on selecting the best quality products to enhance your baking experience.
Optional Tools for Enhanced Presentation
While the primary kitchen tools and equipment are crucial for baking the perfect German Chocolate Cake, optional decorative tools can elevate the presentation of your cake, making it not only delicious but also visually stunning. These tools help you achieve professional-looking finishes and intricate designs that impress your guests and make your cake stand out.
| Category | Tool | Role in the Recipe | Selection Tips |
|---|---|---|---|
| Decorative Tools | Piping Bags for Frosting | Allows precise application of frosting and decorative elements. | Choose high-quality, reusable silicone or durable disposable piping bags. Ensure they come with various nozzle tips for different designs. |
| Cake Turntable | Facilitates smooth and even frosting application and decoration. | Opt for a sturdy, adjustable turntable with a non-slip base to ensure stability during decorating. Consider sizes that fit your countertop space. | |
| Offset Spatula for Smoothing | Provides control and precision when spreading and smoothing frosting. | Select a high-quality, stainless steel or silicone offset spatula with a comfortable handle and a wide blade for efficient coverage. |
Piping Bags for Frosting
Piping Bags for Frosting are indispensable tools for achieving intricate designs and precise decoration on your German Chocolate Cake. Whether you’re creating elegant borders, rosettes, or intricate patterns, piping bags allow for controlled and artistic application of frosting, enhancing both the taste and visual appeal of your cake.
- Selection Tips:
- Material: Choose between disposable and reusable piping bags. Reusable silicone piping bags are environmentally friendly and easy to clean, while disposable plastic piping bags are convenient for one-time use.
- Nozzle Variety: Invest in a set that includes a variety of nozzle tips, such as round, star, and petal tips, to create different decorative effects.
- Size: Ensure the piping bags are large enough to hold an adequate amount of frosting but manageable enough to control during decoration.
- Pro Tip: To make frosting flow smoothly, fill the piping bag with frosting and fold the top of the bag over a cup or a bowl to create a cuff. This helps prevent frosting from spilling out as you pipe.
Cake Turntable
A Cake Turntable is a valuable tool for any baker aiming to decorate cakes with precision and ease. It allows you to rotate the cake smoothly while applying frosting and decorations, ensuring an even and professional finish without awkward hand movements or uneven spreading.
- Selection Tips:
- Sturdiness: Choose a turntable with a robust construction to support the weight of your cake without wobbling. A metal or high-quality plastic base is preferable for durability.
- Adjustable Speed: Some turntables offer adjustable rotation speeds, allowing you to control the pace of decoration based on your comfort and the intricacy of the design.
- Size and Portability: Ensure the turntable fits comfortably on your countertop and can accommodate the size of your cake pans. Compact, lightweight models are easier to store and transport.
- Pro Tip: Before applying frosting, place the cake on the turntable and spin it a few times to ensure it moves smoothly. This practice run helps you get accustomed to the rotation speed and enhances your decorating precision.
Offset Spatula for Smoothing
An Offset Spatula is a specialized tool designed for spreading and smoothing frosting with greater control and finesse. Its unique design, with the blade offset from the handle, allows you to apply even pressure and achieve a flawless finish without touching the cake directly, preventing fingerprints and smudges.
- Selection Tips:
- Blade Material: Opt for stainless steel blades for durability and ease of cleaning. Silicone-tipped spatulas offer flexibility and prevent scratching on delicate cake surfaces.
- Blade Size: Choose a wide blade for covering large areas quickly and a narrower blade for detailed work and edging.
- Handle Comfort: Ensure the spatula has an ergonomic, comfortable handle that provides a firm grip, reducing hand fatigue during extended decorating sessions.
- Pro Tip: To achieve a perfectly smooth surface, hold the offset spatula at a slight angle and use gentle, sweeping motions. Clean the blade between uses to prevent frosting buildup, which can interfere with smooth application.
Why These Optional Decorative Tools Matter
Incorporating optional decorative tools into your baking arsenal allows you to elevate the presentation of your German Chocolate Cake, making it not only a treat for the taste buds but also a feast for the eyes. These tools provide the precision and control needed to create intricate designs, smooth finishes, and professional-looking decorations that enhance the overall appeal of your cake.
- Piping Bags for Frosting enable detailed and creative decoration, allowing you to personalize your cake with unique patterns and designs.
- Cake Turntables facilitate even and effortless frosting application, ensuring that every side of the cake is beautifully coated without streaks or uneven layers.
- Offset Spatulas provide the necessary control for spreading and smoothing frosting, resulting in a polished and immaculate cake surface.
By utilizing these decorative tools, you can transform a simple German Chocolate Cake into a stunning centerpiece suitable for any occasion, impressing both family and guests with your baking and decorating skills.
Ingredient Substitutions and Variations for Decorative Tools
While the listed decorative tools enhance the presentation of your German Chocolate Cake, there are alternative options and creative variations you can consider based on your kitchen setup, budget, or personal preferences:
- Piping Bags for Frosting:
- Alternative: If you don’t have piping bags, use a plastic zip-top bag with a corner snipped off to create a makeshift piping bag. This allows you to pipe basic designs without investing in specialized equipment.
- Creative Uses: Use different household items like a plastic bottle with a small nozzle attachment to achieve unique piping effects.
- Cake Turntable:
- Alternative: Place your cake on a lazy Susan or a rotating tray to simulate the functionality of a cake turntable. Ensure the tray is stable and can rotate smoothly to prevent spills.
- DIY Option: Create your own turntable using a sturdy base and a lazy Susan bearing to allow for smooth rotation.
- Offset Spatula for Smoothing:
- Alternative: Use a regular flat spatula or a bench scraper as a substitute for an offset spatula. While it may require more skill to achieve the same level of smoothness, with practice, you can still create an even finish.
- Multiple Tools: Combine different tools, such as using a spoon for initial spreading and a flat spatula for smoothing, to achieve a polished look without a dedicated offset spatula.
Exploring these substitutions and variations allows you to adapt your decorating process based on the tools you have available, ensuring that you can still create beautifully presented German Chocolate Cakes even without specialized equipment.
Step-by-Step Recipe Instructions
Creating the Ultimate Baker’s German Chocolate Cake involves a series of precise steps that ensure each component of the cake is perfectly executed. From preparing the batter to assembling the final masterpiece, following these detailed instructions will help you achieve a moist, rich, and delicious cake every time. Below, we break down each stage of the process with comprehensive guidance and expert tips.
3.1. Preparing the Cake Batter
The foundation of a great German Chocolate Cake lies in the preparation of the batter. Properly preparing the batter ensures a tender crumb, rich flavor, and perfect texture. This section covers the essential steps: creaming butter and sugar, whisking in eggs and vanilla, and mixing dry ingredients.
Creaming Butter and Sugar
Importance of Proper Creaming for Cake Texture
Creaming butter and sugar is a crucial step in cake making that significantly impacts the texture and structure of the final product. This process involves beating the butter and sugar together until light and fluffy, which incorporates air into the mixture. The aeration achieved during creaming helps the cake rise evenly and contributes to a tender crumb.
Steps to Properly Cream Butter and Sugar:
- Softening the Butter:
- Ensure the butter is at room temperature. Softened butter blends more easily with sugar, allowing for better aeration.
- Tip: Leave the butter out for about 30 minutes before starting or microwave it in short bursts (5-10 seconds) if you’re short on time.
- Measuring the Sugar:
- Use granulated or superfine sugar for optimal creaming. Granulated sugar helps create a finer texture in the cake.
- Mixing Process:
- Place the softened butter in a large mixing bowl.
- Add the measured sugar to the butter.
- Using an electric mixer on medium speed, beat the mixture for about 3-5 minutes until it becomes light in color and fluffy in texture.
- Pro Tip: Scrape down the sides of the bowl periodically to ensure even mixing.
- Checking for Readiness:
- The mixture should appear pale and noticeably increased in volume.
- When you lift the mixer, the mixture should hold peaks for a second before falling back.
Common Mistakes to Avoid:
- Under-Creaming: Results in a dense cake with poor rise.
- Over-Creaming: Can cause the butter to melt, leading to a greasy batter and collapsed cake.
Whisking in Eggs and Vanilla
Techniques for Incorporating Eggs Without Overmixing
Incorporating eggs and vanilla extract into the creamed butter and sugar mixture is essential for adding richness and depth of flavor to the cake. However, it’s crucial to do this gently to maintain the batter’s lightness and prevent overmixing, which can lead to a tough cake.
Steps to Whisk in Eggs and Vanilla:
- Adding Eggs:
- Crack the eggs into a separate bowl to ensure no shells make it into the batter.
- Add the eggs one at a time to the creamed butter and sugar mixture.
- Technique: Beat on low speed after each addition until fully incorporated before adding the next egg. This gradual incorporation helps maintain the batter’s aerated structure.
- Tip: If the mixture starts to curdle, add a small amount of the dry ingredients to help stabilize it.
- Incorporating Vanilla Extract:
- Measure the required amount of pure vanilla extract.
- Pour the vanilla extract into the mixture after the eggs are fully incorporated.
- Technique: Continue to beat on low speed for another 30 seconds to ensure the vanilla is evenly distributed throughout the batter.
- Ensuring Smooth Integration:
- The mixture should remain light and fluffy after adding the eggs and vanilla.
- Avoid overmixing by stopping as soon as the eggs and vanilla are fully incorporated.
Pro Tips:
- Room Temperature Ingredients: Ensure eggs are at room temperature to blend more smoothly with the batter.
- Consistency Check: The batter should be smooth and homogeneous without any visible streaks of butter or sugar.
Mixing Dry Ingredients
Sifting Flour, Cocoa Powder, Baking Powder, and Salt
Properly combining the dry ingredients is vital for an even distribution of leavening agents and flavors, ensuring the cake rises uniformly and has a consistent texture.
Steps to Mix Dry Ingredients:
- Measuring Dry Ingredients:
- All-Purpose Flour: Provides structure.
- Cocoa Powder: Adds rich chocolate flavor.
- Baking Powder: Acts as a leavening agent to help the cake rise.
- Salt: Enhances flavors and balances sweetness.
- Sifting the Dry Ingredients:
- Sift the all-purpose flour, cocoa powder, baking powder, and salt together to remove any lumps and aerate the mixture.
- Pro Tip: Sifting also ensures that the baking powder is evenly distributed, preventing any over-leavened spots in the cake.
- Incorporating Dry Ingredients into Batter:
- Gradually add the sifted dry ingredients to the wet mixture in three parts.
- Technique: Alternate adding the dry ingredients with any liquids (if applicable), starting and ending with the dry ingredients.
- Mix on low speed until just combined. Overmixing can develop gluten in the flour, leading to a dense and chewy texture.
- Achieving a Smooth Batter:
- The batter should be smooth and free of streaks, with all ingredients fully incorporated.
- Consistency Check: The batter should flow easily but not be too runny. It should coat the back of a spoon.
Common Mistakes to Avoid:
- Overmixing: Can result in a tough cake.
- Undermixing: Leads to pockets of flour and uneven texture.
Pro Tips:
- Scrape Down the Bowl: Periodically scrape the sides and bottom of the mixing bowl to ensure all ingredients are fully incorporated.
- Use a Spatula: If necessary, use a silicone spatula to gently fold in any stubborn flour.
3.2. Baking the Cake Layers
Baking the cake layers correctly is essential for achieving the right texture and flavor. This section covers filling the cake pans evenly, essential baking tips, and the importance of cooling the layers properly.
Filling the Cake Pans
Ensuring Even Distribution for Uniform Layers
Properly filling your cake pans ensures that the cake layers bake evenly and have a uniform thickness. This uniformity is crucial for stacking the layers with frosting in between without any sagging or collapsing.
Steps to Fill Cake Pans Evenly:
- Preparing the Cake Pans:
- Greasing: Thoroughly grease each cake pan with butter or non-stick spray to prevent sticking.
- Lining (Optional): For easier removal, line the bottom of each pan with parchment paper.
- Portioning the Batter:
- Divide the batter evenly between the prepared pans. For two 9-inch pans, use approximately half of the batter in each.
- Technique: Use a kitchen scale or measuring cup to ensure equal portions, which promotes even baking.
- Leveling the Batter:
- Gently tap the pans on the countertop to remove any air bubbles and settle the batter evenly.
- Use a spatula to smooth the top of the batter if necessary.
- Avoid Overfilling:
- Fill each pan no more than two-thirds full to allow space for the cake to rise without overflowing.
Pro Tips:
- Uniform Portions: For multiple layers, use a piping bag or ladle to distribute the batter evenly.
- Consistency: Ensure each pan receives the same amount of batter for consistent layer thickness.
Baking Tips
Optimal Oven Temperature and Baking Time
Achieving the perfect bake requires precise control over oven temperature and baking duration. These factors ensure that the cake layers rise properly, cook through evenly, and develop a desirable texture.
Steps for Optimal Baking:
- Preheating the Oven:
- Preheat your oven to the required temperature (typically 350°F or 175°C) before placing the cake pans inside.
- Pro Tip: Use an oven thermometer to verify that your oven reaches and maintains the correct temperature.
- Positioning in the Oven:
- Place the cake pans in the center of the oven to allow for even heat distribution.
- Avoid placing pans too close to the top or bottom heating elements to prevent uneven baking or burning.
- Baking Duration:
- Bake for the recommended time (usually 25-30 minutes for 9-inch pans).
- Start checking for doneness at the minimum time by inserting a toothpick into the center of the cake. It should come out clean or with a few moist crumbs.
- Avoid Opening the Oven Door Frequently:
- Opening the door can cause temperature fluctuations, affecting the cake’s rise and texture.
- Use the oven light and window to monitor progress without disturbing the baking environment.
- Rotating Pans (If Necessary):
- If your oven has hot spots, rotate the cake pans halfway through the baking time to promote even cooking.
Common Mistakes to Avoid:
- Incorrect Temperature: Can lead to undercooked centers or burnt exteriors.
- Overbaking: Results in dry cake layers.
- Underbaking: Leads to gooey or dense centers.
Pro Tips:
- Tent with Foil: If the cake is browning too quickly, tent it loosely with aluminum foil to prevent over-browning while allowing the center to bake through.
- Uniform Pan Sizes: Use pans of the same size and shape to ensure even baking times.
Cooling the Layers
Importance of Cooling Racks for Preventing Soggy Cakes
Proper cooling of cake layers is essential to maintain their structure, texture, and flavor. Cooling the cakes on racks allows air to circulate around them, preventing moisture buildup that can lead to sogginess and ensuring that the cakes set properly for easy handling and assembly.
Steps to Cool Cake Layers Properly:
- Removing from the Oven:
- Once baked, remove the cake pans from the oven using oven mitts.
- Place the pans on a heat-resistant surface away from drafts.
- Cooling on Racks:
- Invert the cake pans onto cooling racks immediately to allow steam to escape.
- Gently tap the bottom of each pan to release the cake.
- If you used parchment paper, carefully peel it away from the cake layers.
- Allowing to Cool Completely:
- Let the cake layers cool on the racks for at least 1 hour or until they reach room temperature.
- Pro Tip: Cooling completely prevents the frosting from melting or sliding when applied.
- Leveling the Cakes (If Necessary):
- Use a serrated knife or cake leveler to trim any domed tops for a flat, even surface.
- This ensures stable stacking and an aesthetically pleasing final cake.
Common Mistakes to Avoid:
- Skipping Cooling: Applying frosting to warm cakes can cause the frosting to melt and the layers to become soggy.
- Overhandling: Moving the cakes too soon can cause them to break or crumble.
Pro Tips:
- Airtight Containers: If not assembling immediately, store cooled cake layers in airtight containers to maintain freshness.
- Room Temperature Frosting: Ensure the frosting is at room temperature for easier application and smoother results.
3.3. Making the Coconut Pecan Frosting
The rich and creamy coconut pecan frosting is what sets the German Chocolate Cake apart. This section guides you through combining the ingredients, adding coconut and pecans for texture, and achieving the perfect consistency for a luscious and spreadable frosting.
Combining Ingredients
Mixing Sweetened Condensed Milk, Butter, and Chocolate
Creating the base of the coconut pecan frosting involves blending sweetened condensed milk, butter, and chocolate to form a smooth and creamy mixture. This combination provides the sweetness, richness, and chocolatey depth that defines the frosting.
Steps to Combine Ingredients:
- Melting the Ingredients:
- In a medium saucepan, combine the sweetened condensed milk and butter.
- Heat over medium-low heat, stirring constantly until the butter is fully melted and the mixture is smooth.
- Adding Chocolate:
- Once the butter and sweetened condensed milk are melted, add the semisweet chocolate chips.
- Continue to stir until the chocolate is completely melted and the mixture is smooth and glossy.
- Cooling Slightly:
- Remove the saucepan from the heat and allow the mixture to cool for a few minutes to prevent overwhipping in the next step.
- Whipping the Mixture:
- Transfer the mixture to a large mixing bowl.
- Using an electric mixer on medium speed, beat the mixture until it becomes light and creamy, about 5-7 minutes.
Pro Tips:
- Consistent Stirring: Stir continuously while melting to prevent the mixture from burning or separating.
- Quality Chocolate: Use high-quality semisweet chocolate for the best flavor and smooth texture.
Adding Coconut and Pecans
Incorporating Shredded Coconut and Chopped Pecans for Texture
Adding shredded coconut and chopped pecans not only enhances the frosting’s flavor but also provides a delightful crunch and chewy texture that complements the smoothness of the frosting and the softness of the cake layers.
Steps to Add Coconut and Pecans:
- Preparing the Coconut:
- Measure the required amount of shredded coconut.
- Optional: Lightly toast the coconut in a dry skillet over medium heat for 2-3 minutes until golden brown to enhance its flavor.
- Chopping the Pecans:
- Measure the required amount of pecans.
- Roughly chop the pecans into small pieces, ensuring they are bite-sized for easy eating.
- Mixing into the Frosting:
- Gradually add the shredded coconut and chopped pecans to the whipped frosting.
- Use a spatula to fold them in gently until evenly distributed throughout the mixture.
Pro Tips:
- Texture Balance: Adjust the amount of coconut and pecans based on your texture preference. More coconut adds chewiness, while more pecans enhance crunch.
- Flavor Enhancement: If you prefer a sweeter frosting, opt for sweetened shredded coconut. For a more robust flavor, use unsweetened or toasted coconut.
Achieving the Perfect Consistency
Tips for Creamy, Spreadable Frosting
The ideal consistency of the coconut pecan frosting should be creamy and easily spreadable, allowing for smooth application between and on top of the cake layers. Achieving this perfect texture involves careful temperature control and proper mixing techniques.
Steps to Achieve Perfect Consistency:
- Monitoring Temperature:
- Allow the melted mixture to cool slightly before whipping to prevent the frosting from becoming too runny.
- Tip: If the frosting is too thick, gently reheat it over low heat and stir until it reaches a spreadable consistency.
- Whipping the Frosting:
- Using an electric mixer on medium speed, beat the frosting until it becomes light and fluffy, about 5-7 minutes.
- Technique: Start mixing slowly to prevent splattering, then increase speed once the ingredients begin to combine.
- Adjusting Consistency:
- If the frosting is too thick, add a tablespoon of milk or heavy cream at a time, beating well after each addition until desired consistency is achieved.
- If the frosting is too thin, add a little more powdered sugar or sifted coconut, beating until thickened.
- Cooling for Stability:
- If you need the frosting to set slightly before application, refrigerate it for 15-20 minutes. Let it soften at room temperature before spreading to ensure easy application.
Pro Tips:
- Consistency Check: The frosting should hold peaks when the mixer is lifted but still be smooth and spreadable.
- Avoid Overwhipping: Overwhipping can cause the frosting to become too stiff or even separate.
3.4. Assembling and Frosting the Cake
The final assembly of the German Chocolate Cake involves stacking the cake layers with frosting in between and applying the frosting smoothly on the exterior. Proper assembly ensures a visually appealing and structurally sound cake.
Layering the Cakes
Properly Stacking Moist Cake Layers with Frosting in Between
Stacking the cake layers correctly is essential for a stable and evenly flavored German Chocolate Cake. Proper layering ensures that each bite delivers the perfect balance of cake and frosting.
Steps to Layer the Cakes:
- Preparing the Layers:
- Ensure all cake layers are completely cooled and leveled for even stacking.
- Place the first cake layer on a cake board or serving platter.
- Applying the Frosting:
- Spread a generous amount of coconut pecan frosting evenly over the first layer using an offset spatula.
- Technique: Hold the spatula at a slight angle and use smooth, sweeping motions to distribute the frosting.
- Adding Subsequent Layers:
- Place the second cake layer on top of the frosting-covered first layer.
- Repeat the frosting application process, ensuring each layer is evenly frosted.
- For multi-layer cakes, continue stacking and frosting until all layers are assembled.
- Pressing Down Slightly:
- Gently press down on each layer to ensure the frosting spreads evenly and the layers adhere properly.
- Pro Tip: Use a cake smoother or the back of a spoon to help distribute the frosting uniformly.
Common Mistakes to Avoid:
- Uneven Frosting: Leads to an unstable stack and inconsistent flavor distribution.
- Skipping Leveling: Results in uneven layers that can cause the cake to topple or become lopsided.
Pro Tips:
- Use a Turntable: Place the cake on a turntable to make frosting application easier and more uniform.
- Refrigerate Between Layers: For larger cakes, refrigerate the assembled layers for 15-20 minutes to set the frosting before adding more layers.
Applying the Frosting
Techniques for Smooth and Even Frosting Application
Applying the frosting smoothly on the exterior of the cake not only enhances its appearance but also ensures that the flavors are balanced in every slice. This step requires careful technique to achieve a professional finish.
Steps to Apply Frosting:
- Preparing the Frosting:
- Ensure the coconut pecan frosting is at room temperature for easy spreading.
- If the frosting has thickened, gently rewhip it with an electric mixer to restore its creamy consistency.
- Spreading the Frosting:
- Place the cake on a turntable or a flat surface.
- Using an offset spatula, start by applying a thin layer of frosting (crumb coat) over the entire cake to seal in crumbs.
- Refrigerate the crumb-coated cake for 15 minutes to set the initial layer.
- Applying the Final Frosting:
- Remove the cake from the refrigerator and apply a generous amount of frosting on top using the offset spatula.
- Smooth the frosting downward on the sides, using gentle, steady motions to create an even layer.
- Technique: Hold the spatula at a 45-degree angle and use a back-and-forth motion to distribute the frosting evenly.
- Smoothing the Exterior:
- For an extra smooth finish, use the spatula to gently glide over the surface, removing any excess frosting.
- Pro Tip: Dip the spatula in hot water, wipe it dry, and use it to smooth out the frosting for a sleek appearance.
Common Mistakes to Avoid:
- Over-Spreading: Can lead to uneven layers and messy frosting.
- Cold Frosting: Makes spreading difficult and can cause the frosting to break.
Pro Tips:
- Consistent Pressure: Apply even pressure while spreading to maintain a uniform thickness.
- Cooling Between Steps: Refrigerate the cake after each frosting step to help set the layers and prevent sliding.
Decorating Tips
Garnishing with Additional Pecans or Coconut for an Attractive Finish
Enhancing the cake’s appearance with thoughtful decorations can elevate it from a simple dessert to a stunning centerpiece. Garnishing adds visual appeal and can also complement the cake’s flavors.
Steps to Decorate the Cake:
- Preparing the Garnishes:
- Pecans: Use whole or halved pecans for a decorative touch. Lightly toast them for added flavor and crunch.
- Coconut: Sprinkle additional shredded coconut over the top or sides for a cohesive look.
- Applying the Garnishes:
- Top Decoration:
- Arrange pecans in a circular pattern or create a decorative mound in the center of the cake.
- Scatter shredded coconut around the pecans for a balanced appearance.
- Side Decoration:
- Drizzle a small amount of extra frosting around the edges to create a border.
- Sprinkle pecans and coconut along the sides for added texture and visual interest.
- Top Decoration:
- Creating Patterns (Optional):
- Use piping bags with decorative tips to add rosettes, swirls, or borders using the remaining frosting.
- Technique: Practice on a piece of parchment paper first to perfect your piping technique before decorating the cake.
- Final Touches:
- Ensure that all garnishes are securely attached and evenly distributed.
- Use a clean offset spatula or bench scraper to smooth out any rough edges or excess frosting.
Common Mistakes to Avoid:
- Overcrowding Decorations: Can overwhelm the cake’s appearance and make it look cluttered.
- Uneven Distribution: Leads to an unbalanced look, detracting from the cake’s overall appeal.
Pro Tips:
- Theme-Based Decorations: Tailor your decorations to the occasion, such as adding festive sprinkles for holidays or fresh berries for spring events.
- Use of Fresh Elements: Incorporate fresh fruits or edible flowers for an elegant and fresh appearance.
- Uniform Garnishing: Ensure garnishes are evenly spaced and proportionate to the size of the cake for a harmonious look.
Summary of Step-by-Step Instructions
By meticulously following these step-by-step recipe instructions, you’ll be well-equipped to bake the Ultimate Baker’s German Chocolate Cake. Each stage, from preparing the batter to decorating the final cake, has been detailed to ensure a seamless baking experience and a deliciously satisfying result. Remember to pay attention to each step, utilize the provided tips, and don’t hesitate to make adjustments based on your preferences to create a personalized and perfect German Chocolate Cake.
Tips and Tricks for the Perfect German Chocolate Cake
Achieving the perfect German Chocolate Cake requires more than just following a recipe. Implementing specific tips and tricks can enhance the cake’s moisture, richness, presentation, and overall quality. This section delves into essential strategies for baking, decorating, storing, and customizing your cake to ensure it stands out as a delectable masterpiece.
4.1. Achieving Moisture and Richness
Creating a moist and richly flavored German Chocolate Cake is the cornerstone of an exceptional dessert. This involves selecting the right ingredients and employing baking techniques that prevent dryness while enhancing the cake’s depth of flavor.
Ingredient Substitutions
Substituting certain ingredients can cater to dietary preferences, enhance flavor profiles, or improve texture without compromising the cake’s integrity.
| Original Ingredient | Substitution Option | Benefit |
|---|---|---|
| Sweetened Condensed Milk | Coconut Condensed Milk or Homemade Version | Dairy-free alternative; adds a subtle coconut flavor |
| Butter | Coconut Oil, Margarine, or Vegan Butter | Dairy-free options; alters flavor slightly |
| Pecans | Walnuts, Hazelnuts, or Almonds | Accommodates nut allergies or personal preferences |
| All-Purpose Flour | Gluten-Free All-Purpose Flour Blend | Makes the cake suitable for gluten-free diets |
| Semisweet Chocolate | Dark Chocolate or Milk Chocolate | Customizes the chocolate intensity and sweetness |
Detailed Substitution Guidelines:
- Sweetened Condensed Milk Alternatives:
- Coconut Condensed Milk: Offers a rich, creamy texture with a hint of coconut, perfect for enhancing tropical flavors.
- Homemade Version: Combine 1 cup of evaporated milk with 1 ½ cups of granulated sugar, simmered until thickened.
- Butter Alternatives:
- Coconut Oil: Provides a similar texture with a subtle coconut aroma.
- Margarine or Vegan Butter: Maintains the creamy consistency while catering to dairy-free diets.
Pro Tips:
- Consistency Matters: When substituting ingredients, ensure that the consistency remains similar to prevent affecting the cake’s texture.
- Flavor Balance: Choose substitutions that complement the existing flavors of the cake, such as using coconut oil to enhance the coconut pecan frosting.
Baking Techniques
Employing specific baking techniques can significantly impact the cake’s moisture and richness, ensuring each bite is tender and flavorful.
Preventing Overbaking to Maintain Moist Layers:
- Accurate Temperature Monitoring:
- Use an Oven Thermometer: Many ovens have temperature fluctuations. An oven thermometer ensures your oven is at the correct temperature.
- Preheat Properly: Always preheat your oven to the specified temperature before placing the cake inside.
- Proper Pan Placement:
- Center Rack: Position cake pans in the center of the oven for even heat distribution.
- Avoid Crowding: Ensure there is ample space around each pan to allow for proper air circulation.
- Check for Doneness Early:
- Toothpick Test: Insert a toothpick into the center of the cake 5 minutes before the minimum baking time. If it comes out clean or with a few moist crumbs, the cake is done.
- Visual Cues: The edges should start to pull away from the sides of the pan, and the top should spring back when lightly touched.
- Cooling Correctly:
- Immediate Cooling: Remove the cake from the oven promptly to prevent residual heat from continuing to bake the cake.
- Use Cooling Racks: Transfer the cake to cooling racks to allow air to circulate and prevent moisture buildup.
Pro Tips:
- Tent with Foil: If the cake is browning too quickly, loosely tent it with aluminum foil to protect the surface while allowing the center to bake through.
- Rotate Pans: Rotate the cake pans halfway through baking to promote even cooking, especially if your oven has hot spots.
4.2. Decorating and Presentation Ideas
A beautifully decorated cake not only tastes better but also elevates the overall dessert experience. Implementing creative frosting techniques and garnishing options can transform your German Chocolate Cake into a stunning centerpiece.
Creative Frosting Techniques
Enhancing the frosting with artistic techniques can give your cake a professional and elegant appearance.
Piping Borders or Swirls for a Professional Look:
- Piping Borders:
- Tools Needed: Piping bags with star or round tips.
- Technique: Apply frosting along the edge of the cake in a steady, circular motion. Vary the pressure to create decorative peaks or smooth lines.
- Design Ideas: Create scalloped edges, rosettes, or intricate patterns to add visual interest.
- Swirls and Rosettes:
- Tools Needed: Piping bags with star tips.
- Technique: Pipe the frosting in a back-and-forth motion to form swirls or rosettes. Start from the center and work outward for symmetry.
- Design Ideas: Add swirls to the top of the cake or create rosettes around the base for a balanced look.
Pro Tips:
- Practice First: Before decorating the cake, practice piping on parchment paper to perfect your technique.
- Consistent Frosting: Ensure the frosting consistency is smooth and spreadable to achieve clean lines and intricate designs.
Garnishing Options
Adding garnishes can enhance both the flavor and aesthetic appeal of your cake, making it more inviting and festive.
Adding Chocolate Shavings, Extra Pecans, or Decorative Sprinkles:
- Chocolate Shavings:
- Tools Needed: Vegetable peeler or sharp knife.
- Technique: Carefully shave thin strips of semisweet or dark chocolate over the top and sides of the cake.
- Design Ideas: Create a snow-like effect, horizontal stripes, or decorative borders with shavings.
- Extra Pecans:
- Preparation: Lightly toast additional pecans to enhance their flavor and crunch.
- Technique: Scatter whole or halved pecans evenly over the frosting or press them gently into the sides.
- Design Ideas: Form concentric circles, random clusters, or create a patterned arrangement for visual interest.
- Decorative Sprinkles:
- Types: Choose from chocolate sprinkles, colored sugar, or festive themed sprinkles based on the occasion.
- Technique: Sprinkle evenly over the frosting for a pop of color and added texture.
- Design Ideas: Create themed patterns, like stars for a celebration or colored sprinkles for a vibrant look.
Pro Tips:
- Balance: Avoid overcrowding the cake with too many garnishes. Aim for a balanced and cohesive look.
- Complementary Flavors: Choose garnishes that complement the cake’s flavors, such as adding a drizzle of caramel or a sprinkle of sea salt for added depth.
4.3. Storage and Serving Suggestions
Proper storage and thoughtful serving can extend the freshness of your German Chocolate Cake and enhance the dining experience for your guests.
Storing the Cake
Best Practices for Keeping the Cake Fresh:
- Covering the Cake:
- Plastic Wrap or Airtight Containers: Wrap the cake tightly in plastic wrap or store it in an airtight container to prevent it from drying out.
- Refrigeration: Since the coconut pecan frosting contains dairy and sweetened condensed milk, refrigerate the cake to maintain freshness and prevent spoilage.
- Freezing for Longer Storage:
- Preparation: Wrap individual slices or the entire cake tightly in plastic wrap and then in aluminum foil.
- Freezing Time: The cake can be frozen for up to 2-3 months without compromising quality.
- Thawing: Thaw the cake in the refrigerator overnight before serving to ensure it remains moist and flavorful.
- Avoiding Contamination:
- Separate Layers: If not assembling immediately, store the cake layers and frosting separately to prevent sogginess and maintain structural integrity.
- Labeling: Label the storage containers with the date to keep track of freshness.
Pro Tips:
- Room Temperature Storage: If you plan to serve the cake within a day, you can store it at room temperature covered with a cake dome or an inverted bowl to maintain moisture.
- Avoid Direct Sunlight: Keep the stored cake away from direct sunlight and heat sources to prevent melting of the frosting and drying out of the cake layers.
Serving Tips
Ideas for Slicing, Plating, and Pairing with Beverages:
- Slicing the Cake:
- Tools Needed: Sharp serrated knife and a long, smooth spatula.
- Technique: Use a hot, serrated knife for clean cuts. Wipe the knife between each slice to maintain smooth edges.
- Portion Control: Aim for even slices to ensure each piece has a balanced amount of cake and frosting.
- Plating the Cake:
- Serving Boards or Plates: Use attractive serving boards or plates that complement the cake’s appearance.
- Garnishes: Add fresh fruits, a dusting of cocoa powder, or a drizzle of chocolate syrup for an elegant presentation.
- Individual Servings: For special occasions, consider pre-slicing the cake and serving on individual dessert plates.
- Pairing with Beverages:
- Coffee and Espresso: The rich chocolate flavors pair wonderfully with the boldness of coffee.
- Milk: A classic pairing, especially with younger audiences or those who enjoy a creamy contrast.
- Dessert Wines: Sweet wines like port or sherry complement the cake’s sweetness and depth.
- Tea: Herbal or black teas can provide a refreshing balance to the richness of the cake.
Pro Tips:
- Temperature Harmony: Serve the cake at room temperature for the best flavor and texture experience.
- Clean Presentation: Ensure that the serving area is clean and free from distractions to highlight the cake’s beauty.
4.4. Recipe Variations and Customizations
Customizing your German Chocolate Cake allows you to tailor the dessert to your personal preferences, dietary needs, or to create unique flavor profiles that set your cake apart.
Flavor Enhancements
Adding Espresso Powder or Different Nuts for Varied Flavors:
- Espresso Powder:
- Purpose: Intensifies the chocolate flavor and adds a subtle coffee undertone.
- How to Incorporate:
- Add 1-2 teaspoons of espresso powder to the dry ingredients before mixing.
- Pro Tip: Dissolve the espresso powder in a small amount of hot water before adding to the batter for even distribution.
- Different Nuts:
- Variety: Experiment with walnuts, hazelnuts, or almonds instead of pecans for a different flavor and texture.
- Preparation: Lightly toast the nuts to enhance their flavor before incorporating them into the frosting.
- How to Incorporate:
- Substitute pecans with an equal amount of your chosen nut.
- Pro Tip: Use a mix of nuts for added complexity and visual appeal.
- Additional Flavorings:
- Vanilla Bean Paste: Adds a more intense vanilla flavor and visually appealing specks.
- Orange Zest: Introduces a citrusy brightness that complements the chocolate.
- Cinnamon: Adds warmth and a hint of spice to the cake.
Pro Tips:
- Balance Flavors: Ensure that additional flavorings complement rather than overpower the chocolate and coconut pecan elements.
- Gradual Addition: Add flavor enhancers gradually, tasting as you go to achieve the desired intensity.
Dietary Adjustments
Making Gluten-Free or Dairy-Free Versions of the Cake:
- Gluten-Free German Chocolate Cake:
- Flour Substitute: Use a gluten-free all-purpose flour blend that includes xanthan gum for structure.
- Binding Agents: Ensure the substitute flour blend has adequate binding agents to mimic gluten’s properties.
- Texture Adjustment: Gluten-free flours can sometimes result in a denser texture. Adding an extra egg or a tablespoon of oil can help maintain moisture and tenderness.
- Dairy-Free German Chocolate Cake:
- Butter Substitute: Replace butter with coconut oil, vegan margarine, or another plant-based butter alternative.
- Sweetened Condensed Milk Substitute: Use coconut condensed milk or a homemade dairy-free version using coconut cream and sugar.
- Dairy-Free Chocolate: Ensure that the chocolate used in the frosting is dairy-free, opting for vegan dark chocolate varieties.
- Vegan German Chocolate Cake:
- Egg Substitute: Use flax eggs (1 tablespoon ground flaxseed mixed with 3 tablespoons water, let sit for 5 minutes) or commercial egg replacers.
- Milk Substitute: Replace any dairy milk with almond milk, soy milk, or another plant-based milk.
- Additional Adjustments: Ensure all ingredients, including baking powder and vanilla extract, are vegan-friendly.
Pro Tips:
- Ingredient Labels: Always check labels to ensure substitutes are free from allergens or unwanted ingredients.
- Testing Substitutions: Test each substitution individually to understand its impact on the cake’s texture and flavor before making comprehensive changes.
5. Frequently Asked Questions (FAQs)
Addressing common questions can help clarify doubts and provide additional guidance to ensure your German Chocolate Cake turns out perfectly every time.
Can I make the cake ahead of time?
Yes, you can make the German Chocolate Cake ahead of time.
- Baking Ahead:
- Layers: You can bake the cake layers up to two days in advance. Store them in an airtight container at room temperature or refrigerate if not assembling immediately.
- Frosting: The coconut pecan frosting can also be made a day ahead. Store it in the refrigerator and allow it to come to room temperature before using.
- Assembling Ahead:
- Assembled Cake: It is best to assemble the cake on the day of serving to maintain freshness. However, you can assemble it up to 24 hours in advance and store it in the refrigerator, covered tightly with plastic wrap or in an airtight container.
- Freezing:
- Entire Cake: You can freeze the assembled cake for up to three months. Wrap it tightly in plastic wrap and then in aluminum foil to prevent freezer burn.
- Thawing: Thaw the cake in the refrigerator overnight before bringing it to room temperature for serving.
Pro Tips:
- Prevent Drying: Ensure all components are thoroughly cooled before storing to prevent condensation and sogginess.
- Labeling: Label the stored cakes with the date to keep track of freshness.
What can I substitute for pecans?
Several alternatives can be used in place of pecans, depending on dietary needs and flavor preferences:
- Walnuts:
- Flavor Profile: Similar nutty flavor with a slightly bitter edge.
- Texture: Provides a crunchy texture, similar to pecans.
- Hazelnuts:
- Flavor Profile: Sweet and rich, with a distinct earthy undertone.
- Texture: Adds a crunchy and slightly oily texture.
- Almonds:
- Flavor Profile: Mild and sweet, with a subtle bitterness.
- Texture: Offers a firm crunch, which can slightly alter the cake’s texture.
- Macadamia Nuts:
- Flavor Profile: Buttery and rich, with a creamy texture.
- Texture: Adds a luxurious crunch but can be more expensive.
- Sunflower Seeds:
- Flavor Profile: Mild and slightly nutty, suitable for nut-free diets.
- Texture: Provides a similar crunch without the nut allergens.
Pro Tips:
- Toasting Nuts: Lightly toast the substitute nuts to enhance their flavor and crunch.
- Chopping Consistently: Ensure all nuts are chopped to a similar size for even distribution and texture.
How do I store the frosting separately?
Storing the coconut pecan frosting separately ensures it remains fresh and maintains its ideal consistency for later use.
- Refrigeration:
- Container: Transfer the frosting to an airtight container.
- Duration: Store in the refrigerator for up to one week.
- Thawing: Allow the frosting to come to room temperature before using. You may need to re-whip it with an electric mixer to restore its creamy texture.
- Freezing:
- Container: Use a freezer-safe container, leaving some space for expansion.
- Duration: Freeze for up to three months.
- Thawing: Thaw in the refrigerator overnight and then bring to room temperature. Re-whip as needed to achieve the desired consistency.
- Short-Term Storage:
- At Room Temperature: If using the frosting within a few hours, keep it at room temperature in an airtight container to prevent it from drying out.
Pro Tips:
- Avoid Contamination: Use a clean utensil each time you scoop out frosting to prevent bacterial growth.
- Consistency Adjustment: If the frosting becomes too stiff after refrigeration or freezing, add a small amount of milk or dairy-free alternative and beat until smooth.
Can I use a different type of chocolate for the frosting?
Yes, you can experiment with different types of chocolate to customize the frosting’s flavor and texture:
- Dark Chocolate:
- Flavor Profile: Rich and slightly bitter, enhancing the overall chocolate depth.
- Texture: Creates a firmer, more intense frosting.
- Milk Chocolate:
- Flavor Profile: Sweeter and creamier, offering a milder chocolate taste.
- Texture: Results in a smoother and softer frosting.
- White Chocolate:
- Flavor Profile: Sweet and creamy with a distinctive vanilla undertone.
- Texture: Provides a rich and buttery consistency, though it may be sweeter.
- Bittersweet or Semi-Sweet Chocolate:
- Flavor Profile: Balances sweetness and bitterness, suitable for a classic chocolate flavor.
- Texture: Achieves a smooth and velvety frosting similar to traditional recipes.
- Artisan or Flavored Chocolates:
- Options: Incorporate flavored chocolates like salted caramel, mint, or orange-infused chocolates for unique flavor profiles.
- Texture and Taste: Adds distinct tastes and visual appeal, but ensure compatibility with other frosting ingredients.
Pro Tips:
- Quality Matters: Use high-quality chocolate with a high cocoa percentage for the best flavor and smooth texture.
- Melting Carefully: Melt the chocolate gently over a double boiler or in short bursts in the microwave to prevent burning or seizing.
- Balancing Sweetness: Adjust the amount of sweetened condensed milk based on the sweetness of the chocolate used to maintain a balanced flavor.
6. Conclusion
Creating the Ultimate Baker’s German Chocolate Cake is a rewarding endeavor that combines rich flavors, moist textures, and stunning presentation. By following the comprehensive, step-by-step guide provided, you can bake a cake that not only tastes exceptional but also impresses visually, making it a centerpiece for any occasion.
Recap
- Key Steps: From carefully selecting high-quality ingredients and mastering essential baking techniques to utilizing the right tools and applying creative decorating methods, each step is crucial for achieving a perfect German Chocolate Cake.
- Highlights: Emphasis on moisture and richness through ingredient substitutions and baking precision, as well as enhancing presentation with professional frosting and garnishing techniques.
Encouragement
Don’t be intimidated by the complexity of the recipe. Baking is as much an art as it is a science, and with the detailed instructions and expert tips provided, you’re well-equipped to create a delicious and visually stunning German Chocolate Cake. Whether you’re an experienced baker or a beginner, this recipe is designed to be foolproof and adaptable to your personal preferences